

 Z
Z
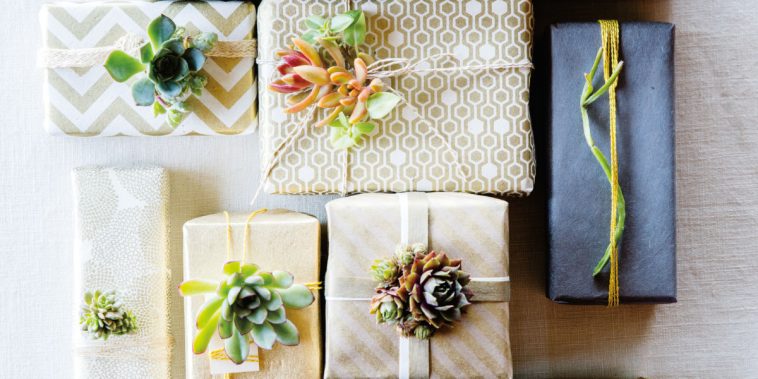
Every year when gift-giving season rolls around, I find myself drawn more and more to the details, the subtle personal touches that transform a wrapped box into something that feels like it came from the heart. One of the easiest and most charming ways I’ve found to elevate my gift presentations is through hand-lettered tags. With a few tools, some creativity, and a little practice, I’ve discovered that DIY hand lettering for gift tags adds personality that store-bought tags just can’t match.
This guide walks you through my entire process. Whether you’re making holiday tags, birthday greetings, or even tags for homemade treats, hand lettering adds a layer of care and style that never goes unnoticed.
Why I Started Making My Own Gift Tags
I used to rely on pre-made gift tags from the store, but over time I felt they didn’t reflect the spirit of what I was giving. I wanted my tags to say more than just “To” and “From.” I wanted them to communicate love, joy, or gratitude. That’s when I started experimenting with markers, brush pens, and cardstock. Once I saw the impact, I never looked back.
DIY hand lettering for gift tags quickly became a staple in my craft routine. It’s relaxing, expressive, and always impresses the recipient.
Tools and Supplies I Use
To get started with your own hand-lettered tags, you only need a few essentials. Here’s what I usually keep on hand:
Quality Paper or Tags
I use blank gift tags made of cardstock or watercolor paper. Kraft paper tags give a rustic look, while white or colored tags allow the ink to pop more vibrantly.
Writing Tools
Brush pens are my favorite for DIY hand lettering for gift tags. Brands like Tombow, Pentel, and Crayola (yes, even Crayola markers work great for beginners) are easy to control and available in many colors. Fineliners help with detailed accents, borders, or fine print.
Pencil and Eraser
Sketching out your design lightly in pencil helps you avoid mistakes and align your text before committing with ink.
Ruler and Stencil (Optional)
Sometimes I want perfect spacing or alignment, and that’s when I reach for a ruler. Stencils can help with adding uniform elements like borders, banners, or small shapes.
Embellishments
Once the lettering is done, I like to add flourishes, small hearts, stars, leaves, or swirls. Washi tape, rubber stamps, or tiny stickers can also add dimension.
Choosing a Lettering Style That Fits the Occasion
One thing I’ve learned is that the style of lettering sets the tone for the gift. For birthdays, I lean into bold, bubbly letters with playful colors. For weddings or anniversaries, I use elegant script with soft pastels. Holiday tags get a little of everything, depending on the theme I’m going for.
Here are a few basic styles I like using:
- Modern Script: Loopy and flowing, great for romantic or holiday gifts.
- Block Lettering: Bold and easy to read, perfect for kids or casual gifts.
- Bounce Lettering: A playful variation of script where the letters go up and down on purpose.
- Monoline: Consistent width throughout, ideal for minimalistic tags.
Basic Hand Lettering Techniques
When I first began DIY hand lettering for gift tags, I found it helpful to break the process down into steps. Here’s how I usually approach each tag.
1. Sketch the Layout
I lightly sketch the words in pencil. If I’m writing a longer message like “Merry Christmas” or “Happy Birthday,” I divide the tag into sections and center each word. If space allows, I’ll add a border or banner for decoration.
2. Add Lettering Strokes
Using my brush pen, I go over the pencil lines, keeping in mind the pressure difference, heavy downstrokes and light upstrokes. That contrast is what gives hand lettering its charm.
3. Embellish the Design
After the ink dries, I erase the pencil marks and add embellishments. I might use fineliners to add shadow lines, dots, or sparkles around the lettering.
4. Add the Final Touch
If I’m feeling creative, I’ll match the tag design to the gift wrap. For example, if the gift has snowflakes on it, I’ll add hand-drawn snowflakes around the lettering. It ties everything together beautifully.
Practicing Without Pressure
I’ll be honest, my first attempts were far from perfect. The key is practice. I started by lettering common holiday phrases or short messages on scrap paper. Over time, my consistency improved and I developed my own signature style.
If you’re just starting out, I suggest creating a “lettering journal.” In it, you can practice alphabets, explore different fonts, or sketch layouts. This has been a game-changer for me in building muscle memory and staying inspired.
Ideas for What to Write
The possibilities are endless, but here are some of my go-to phrases when I make DIY hand lettering for gift tags:
- “Made With Love”
- “A Little Something for You”
- “To Brighten Your Day”
- “Happy Holidays”
- “You Are Loved”
- “Especially for You”
I also love including the recipient’s name in a large, decorative font and writing the message in a smaller size underneath.
Creative Variations
Once you’re comfortable with basic tags, you can experiment with different techniques and materials. Here are a few ideas I’ve tried:
Watercolor Backgrounds
Watercolor adds texture and color without much effort. I’ll paint the tag lightly with a wash of color, let it dry, then do the hand lettering on top. It gives the tag a dreamy, artsy feel.
Kraft Paper and White Ink
For a rustic and modern vibe, I use kraft paper tags and write with white gel pens or paint markers. The contrast looks stunning and makes the message pop.
Layered Tags
Sometimes I layer a smaller tag over a larger one and tie them together with twine. One tag has the name, and the other carries a longer message or design.
Themed Sets
For birthdays or holidays, I often create a whole set of coordinating tags in different styles. It’s a fun way to keep things fresh and experiment with new ideas.
Mistake-Proof Tips That Helped Me
Let’s be real, not every tag turns out perfect. But I’ve found a few tricks to minimize errors:
- Always test your pen on the paper before starting
- Use light pencil lines as a guide, and erase gently after the ink dries
- If a pen bleeds or smudges, switch to a thicker tag or different pen
- Keep baby wipes handy for cleaning smudges from your hands
When something doesn’t work out, I simply reuse the back of the tag or cut it into a smaller shape and start again. No big deal.
When and Where I Use Hand-Lettered Tags
I’ve used DIY hand lettering for gift tags in countless ways over the years. Here are a few of my favorite scenarios:
- Wedding favors: Each guest gets a hand-lettered tag with their name or a thank-you message
- Holiday baskets: A hand-lettered message adds so much heart to a homemade gift basket
- Baked goods: I wrap cookies or cakes and add a tag that says “Baked with Love”
- Classroom gifts: When my kids give out small gifts to teachers or classmates, the tags make them extra special
No matter the occasion, hand-lettered tags elevate the presentation and add a sense of care and creativity.
A Few of My Favorite Pens and Supplies
For those interested in specifics, here’s what I reach for most often:
- Tombow Dual Brush Pens: Great for blending colors and practicing thick and thin strokes
- Pentel Fude Touch Sign Pen: Perfect for small tags with delicate strokes
- Micron Fineliners: I use these for outlining, details, and tiny embellishments
- Sakura Gelly Roll White Pen: My go-to for kraft paper tags
And I always keep a variety of blank tags in different shapes and sizes on hand, so I’m ready for whatever inspiration strikes.
Why I Keep Coming Back to Hand-Lettering
In a world filled with digital shortcuts, there’s something refreshing about doing things by hand. DIY hand lettering for gift tags doesn’t require fancy tools or years of experience. It’s about adding heart to the gifts I give. And for me, the act of slowing down and writing out a message by hand connects me to the recipient in a meaningful way.
Even if my lettering isn’t perfect, it’s always received with a smile. That’s what keeps me coming back to this simple but powerful craft.
Final Thoughts
DIY hand lettering for gift tags is one of those projects that looks impressive but is totally accessible. With just a few basic supplies, a little practice, and some creative flair, you can create beautiful, personal touches for any occasion. Whether you’re new to hand lettering or looking to refine your technique, I promise it’s worth trying.
The satisfaction of seeing your own handwritten message tied to a gift is truly one of the most rewarding parts of the DIY experience. Every tag tells a story. Every stroke of ink is a reminder that you made something with care.
Now go grab your pens and tags, and start creating.


GIPHY App Key not set. Please check settings