

 Z
Z
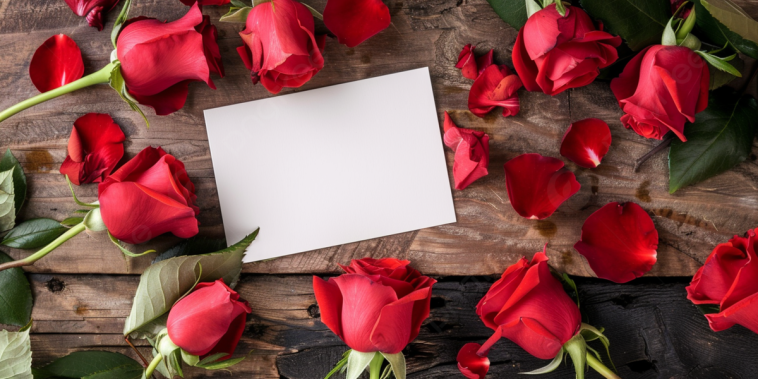
Handmade cards have always had a special place in my heart, but once I discovered the magic of 3D cards, my creativity took on an entirely new dimension, literally. In this step-by-step guide to making 3D cards, I’ll walk you through the process of building beautiful, layered designs that truly pop off the page. These cards not only stand out visually, but they also carry a tactile quality that draws people in and leaves a lasting impression.
Whenever I give out a 3D card, it’s almost always met with a “Wow, you made this?” and I absolutely love how a few folds, layers, and clever techniques can turn a flat piece of cardstock into a tiny piece of art. Whether you’re making birthday cards, thank you notes, or holiday greetings, this guide will help you learn how to bring your ideas to life in three dimensions.
Let’s dive into the basics and move all the way up to creative techniques and finishes that will make your handmade cards look polished, thoughtful, and professional.
Essential Supplies for 3D Card Making
Before jumping into the step-by-step guide to making 3D cards, it helps to get your materials in order. I try to keep my workspace well stocked, but even with minimal tools, you can create stunning effects.
Here’s what I typically use:
- Heavyweight cardstock or blank card bases
- Patterned paper or scrapbook paper
- Foam adhesive squares or double-sided foam tape
- Scissors and a craft knife
- Ruler and pencil
- Bone folder for crisp folds
- Paper trimmer
- Glue stick or tacky glue
- Decorative elements like die cuts, stickers, ribbon, lace, or buttons
Optional, but helpful:
- Cutting mat
- Embossing tools or scoring board
- Stamps and ink pads
- Decorative edge scissors
- A hot glue gun for heavier embellishments
With these basics, you’ll be ready to follow this full step-by-step guide to making 3D cards, even if you’re a beginner.
Planning the Card Concept
I always start with a general idea. What is the occasion? Who is the card for? What colors or themes suit that person or event?
Some of my favorite themes for 3D cards include:
- Florals with layered petals
- Birthday cakes with tiered designs
- Butterflies and nature scenes
- Pop-up hearts for Valentine’s Day
- Mini presents and balloons
- Holiday scenes with snow, trees, or stars
Once I decide on a theme, I sketch a quick design. Nothing fancy, just enough to guide the layout and help me plan where each layer and pop-up will go. Then, I choose my color palette and pull papers that fit the look I want.
Creating the Card Base
In this step-by-step guide to making 3D cards, the foundation is a sturdy base. I usually use an 8.5 x 11-inch sheet of cardstock folded in half, creating a 5.5 x 8.5-inch card.
To make a clean fold, I score the paper using a bone folder or the edge of a ruler and gently fold it in half. This gives the card a professional look and helps it stand upright without warping.
I often cut smaller panels of patterned paper to glue onto the front or inside of the card as backgrounds. This helps build visual interest from the start.
Adding Layers for Depth
This is where the 3D part comes in. To create layers, I cut out various elements, flowers, shapes, sentiments, or objects, either by hand, with a cutting machine, or using dies. Then, I use foam adhesive squares or foam tape to raise those pieces above the base layer.
Each added element gives the card a sense of depth and dimension. The more layers I add, the more dynamic the card becomes. For example:
- A flower card might have three layers of petals
- A birthday cake could have stacked tiers with candles raised separately
- A winter scene might include trees, snowflakes, and a raised house
Spacing out each layer creates beautiful shadows and highlights. I’m careful not to overcrowd the design though, sometimes less is more.
Making Pop-Up Elements Inside the Card
The inside of the card can be just as exciting as the front. One technique I love using is the classic pop-up fold.
Here’s how I make a simple pop-up panel:
- Open the card base and measure where I want the pop-up to appear
- Cut two short parallel slits about an inch apart in the middle of the card fold
- Fold that section inward toward the card’s interior
- When the card is opened, the tab pops forward, ready to hold an embellishment
I attach a flat decoration like a heart, character, or shape to the pop-up tab. As soon as the card is opened, it jumps out in a fun and surprising way.
You can build more complex pop-ups by creating multiple tabs or even using accordion-style folds. I’ve made cards with tiered pop-up birthday cakes, bouquets, and even spinning wheels.
Decorating with Texture and Details
What really brings 3D cards to life is texture. I add dimension with layers of ribbon, twine, felt shapes, or fabric. I like mixing materials for a more engaging look and feel.
A few of my favorite techniques:
- Using lace or burlap behind raised elements
- Gluing tiny buttons in place of flower centers
- Adding faux stitching with a fine-tip marker
- Creating shadow effects with ink around edges
- Layering torn paper for a rustic finish
- Using die-cut leaves or branches for added realism
All these finishing touches take the project from a basic card to something you’d expect from a boutique shop.
Creating 3D Cards for Different Occasions
What I love most about this step-by-step guide to making 3D cards is how adaptable it is. I’ve made personalized cards for every kind of occasion, using the same techniques with different themes.
Birthday Cards
I often make a tiered cake design using layered rectangles, each one popped up with foam tape. I add candles, glitter, and confetti for sparkle.
Wedding and Anniversary
For these, I use soft pastel shades, raised lace panels, or pearl stickers. A heart-shaped cutout window backed with vellum always feels romantic.
Holiday Greetings
Christmas cards are perfect for 3D effects. I’ve made cards with layered snowmen, gift boxes that pop up, and forest scenes with glittery snow.
Thank You Cards
A floral arrangement using layered die-cut flowers always feels personal. I stamp “Thank You” and raise it up on a banner for extra emphasis.
New Baby
I love creating baby-themed cards with 3D mobiles, tiny booties, or layered clouds with stars. Pastels, ribbon, and soft textures are great for these.
Tips for Success
Here are a few tricks I’ve picked up while working on this step-by-step guide to making 3D cards:
- Use a light hand with glue to prevent wrinkling
- Test pop-up mechanisms with scrap paper before final assembly
- Match envelope size before finalizing card dimensions
- Let ink dry fully before layering
- Keep extra foam squares and glue dots on hand for quick fixes
- Store cards flat under books to help them stay neat
Even when I make mistakes, I learn something new. Not every 3D card needs to be complex to be impressive.
Making Your Own Templates
Once I get comfortable with the basics, I like creating reusable templates. I sketch my card base, pop-up positions, and element sizes on a piece of cardstock and label each part. This way, I can trace or replicate my designs again without remeasuring.
I also keep a folder of stencils and traced shapes, like hearts, stars, circles, or banners, that I can use over and over. It speeds up the process and helps when I’m short on time but still want to make something stunning.
Storage and Mailing
Since 3D cards are thicker than regular ones, I usually use padded envelopes or make my own box envelopes using cardstock. If I’m mailing the card, I make sure all embellishments are securely attached and avoid using bulky or delicate materials.
For hand-delivered cards, I tie them with ribbon and place them in a small gift bag. I often include a matching envelope or seal the card with a wax stamp for an extra special touch.
Inspiring Others with 3D Card Projects
Sharing my 3D cards online or giving them away has led to so many fun conversations and collaborations. Friends often ask how I made a certain design, and I love walking them through the process.
This step-by-step guide to making 3D cards has helped me inspire others to start their own card-making journey. Once people see how achievable and fun it is, they realize it doesn’t take a professional artist to make something beautiful and heartfelt.
Final Thoughts
Taking the time to make a 3D card is one of the most rewarding creative outlets I know. It’s relaxing, thoughtful, and the result is something you’ll be proud to give. Whether it’s your first card or your fiftieth, each one is a unique piece of handmade joy.
I hope this step-by-step guide to making 3D cards helps you explore your own ideas and encourages you to experiment with layers, textures, and pop-up surprises. With a few supplies and a little imagination, you can turn simple paper into a heartfelt masterpiece.
So go ahead, grab your scissors and glue, and give someone a reason to say “Wow” the moment they open your card.

GIPHY App Key not set. Please check settings