

 Z
Z
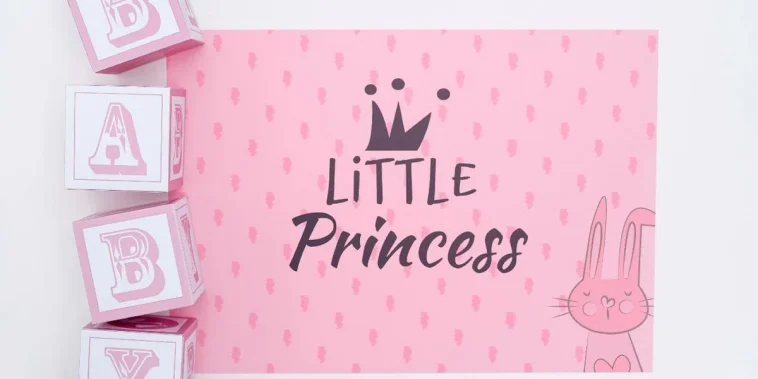
Welcoming a new life into the world is one of the most joyful moments anyone can celebrate. One way I love to contribute to this beautiful occasion is by making DIY baby shower cards with cute themes. There’s something truly special about giving a handmade card, especially when it’s filled with thoughtful details and charming designs. These cards aren’t just pieces of paper, they become keepsakes that the parents-to-be may cherish for years.
Creating DIY baby shower cards with cute themes is more than just a fun weekend project. It’s a chance to get creative, make something meaningful and personalize a message that reflects your excitement for the upcoming arrival. Whether the baby shower is for a boy, girl or a surprise gender reveal, I always try to design cards that match the tone of the celebration and include adorable touches that make everyone smile.
In this guide, I’m going to share everything I’ve learned about designing baby shower cards that are sweet, heartfelt and eye-catching. From materials and layout ideas to finishing touches and theme inspiration, let’s walk through how to make baby shower cards that stand out.
Gathering Your Materials
I like to start by preparing all the materials I’ll need. This helps the whole process go more smoothly and gives me a chance to see how everything fits together.
Here’s a list of supplies I usually use for baby shower cards:
- Blank card bases in pastel colors
- Patterned paper with baby motifs like stars, clouds, animals or bottles
- Stamps with baby-related phrases or icons
- Ink pads in soft shades like mint, blush or lavender
- Scissors or a paper trimmer
- Glue stick or double-sided tape
- Foam adhesive squares for dimension
- Washi tape and ribbon
- Stickers, rhinestones or small wooden shapes
- Colored pens or calligraphy markers
You don’t need fancy tools to make a cute card. Often, it’s the thoughtful layering and playful theme that does the magic.
Deciding on a Color Scheme
When making DIY baby shower cards with cute themes, I pay close attention to the color palette. Classic baby blues and pinks always work well, but I also love soft yellows, greens and neutrals. For gender-neutral designs, a palette of gray, white and pastel peach adds a lovely modern twist.
Once I settle on a color scheme, I make sure everything, from the base card to embellishments, feels cohesive. I’ve found that using two to three main colors keeps the design from getting too busy, while still allowing space for creativity.
Choosing a Theme
One of the best parts of designing these cards is picking the theme. Cute baby animals, tiny feet, baby bottles, onesies, clouds, moons and stars, there are so many sweet ideas to choose from.
Here are some of my go-to baby shower card themes:
- Woodland Creatures: Foxes, owls, bears and bunnies with leafy accents
- Twinkle Twinkle Little Star: Stars, moons and soft constellations
- Sweet as Honey: Bees, hives and honey pots with soft gold accents
- Little Sailor: Anchors, sailboats and waves in navy and white
- Under the Sea: Whales, seahorses, bubbles and sand
- Baby Animals: Giraffes, elephants, lions and pandas
- Hot Air Balloon Rides: Balloons floating over a dreamy sky
- Nursery Rhyme Inspired: Humpty Dumpty, Hey Diddle Diddle or Rock-a-bye Baby
After choosing the theme, I gather elements to support it. For a woodland creature card, I may stamp a baby deer and add some leafy paper in the background. For a moon and stars card, I might use metallic gold cardstock and tiny star embellishments.
Designing the Card Front
I always begin by thinking about what will go on the front of the card. I like to sketch a quick layout to decide where I want each element to sit.
Here are a few design layouts I often use:
- A central circle or heart with a stamped baby image inside
- A row of baby onesies hanging on a stamped clothesline
- A vertical strip of patterned paper on the left and a sentiment on the right
- A layered frame around a cute image with corner embellishments
To add dimension, I use foam adhesive squares to lift key images or text off the card. It gives the card a professional, boutique-style feel.
I always make sure that any text, like “Welcome Baby” or “A New Adventure Begins,” is readable and placed where it naturally draws the eye.
Creating an Interactive Element
If I want to go the extra mile, I’ll include a pop-up inside or a sliding tab that reveals a hidden message. Interactive elements are fun and surprising, and they make the card feel like a tiny gift on its own.
Here are a few ideas for interactive elements:
- A peek-a-boo window with a swinging flap
- A pull-out tag with a sweet note
- A pop-up baby animal on the inside
- A mini envelope with a secret message inside
Adding just one interactive feature can make DIY baby shower cards with cute themes extra memorable.
Personalizing the Message
The inside of the card is where I add a personal message. Depending on the shower, I might write something funny, sentimental or poetic.
Some messages I’ve written in the past include:
- “Wishing you sleepless nights filled with joy and morning cuddles that melt your heart.”
- “Get ready for tiny toes, baby giggles and a lifetime of love.”
- “The adventure is just beginning, congratulations on your growing family.”
- “So tiny, so sweet, so wonderfully yours.”
If I know the name of the baby in advance, I love to include it in the card. It makes everything feel that much more special.
Adding Texture and Detail
Texture is key when making DIY baby shower cards with cute themes. I like to layer different materials and textures to give the card depth and dimension.
Here are some ways I add texture:
- Use a scalloped edge trimmer on one side of a card layer
- Add a bow made from ribbon or baker’s twine
- Use embossing folders for a quilted background
- Attach a felt animal cutout or foam sticker
- Layer vellum over patterned paper for a soft, dreamy look
Even a little texture goes a long way in turning a flat design into something tactile and delightful.
Adding Finishing Touches
Once the main design is done, I review the card to see what it might still need. Sometimes, just one small addition like a pearl, a button or a tiny heart sticker can complete the whole look.
I make sure to double-check that everything is glued securely, that ink is dry and that the message is legible. I often take a few photos before giving the card away, just to keep a memory of the design.
Then, I slip it into a coordinating envelope, often decorated with a matching sticker or washi tape, and it’s ready to go.
Crafting in Batches
Whenever I attend multiple showers in a season, I craft several cards at once using the same layout and theme. I might vary the colors or embellishments slightly, but working in batches saves time and helps me build a library of baby shower cards to have on hand.
Crafting in batches also makes it easier to use up paper scraps and small embellishments that might otherwise be forgotten. I love organizing a weekend session where I make five or six cards in a row with my favorite papers and stamps.
Making It a Group Activity
Making DIY baby shower cards with cute themes is also a fantastic group activity. I’ve hosted a few cardmaking nights with friends or family where we gather supplies, put on some music and create together.
It’s fun, relaxing and everyone leaves with a stack of handmade cards they can use or gift. For baby showers specifically, this can even become part of the celebration. Guests can make a card for the baby and write a note inside, creating a lovely keepsake box for the parents.
Eco-Friendly Card Ideas
If you want your handmade cards to be a little greener, there are simple swaps that can help. I like using recycled paper or upcycled materials when possible.
Other eco-friendly ideas include:
- Using paper scraps and leftover ribbon from other projects
- Printing your own card bases from recycled cardstock
- Making envelopes from old maps or sheet music
- Choosing non-toxic glue or natural ink
Making something handmade with care already has a lower impact than buying mass-produced cards, but these small steps make it even more thoughtful.
Celebrating with Heart
Every time I sit down to make DIY baby shower cards with cute themes, I remind myself that this card will likely be kept in a memory box. That’s the real magic of handmade gifts, they’re filled with time, care and personality.
The card you make today might one day be looked at years later, when the baby is grown, and that’s why it’s worth putting your heart into it. Whether you’re new to cardmaking or an experienced crafter, there’s always room to add your own creative flair and unique touch.
Conclusion
Creating DIY baby shower cards with cute themes is such a rewarding project. With a few simple tools, a touch of creativity and a clear vision, you can make cards that brighten someone’s special day and become keepsakes for the future.
From choosing a soft color palette to picking a theme that reflects joy and innocence, each decision you make builds a card that’s more than paper, it’s a message of love. And when you add texture, layers, a heartfelt message and maybe even an interactive surprise, your handmade card becomes unforgettable.
Next time you’re invited to a baby shower, skip the store-bought aisle and head to your crafting table instead. You’ll create something more meaningful, more personal and more treasured than anything you can buy.

GIPHY App Key not set. Please check settings