

 Z
Z
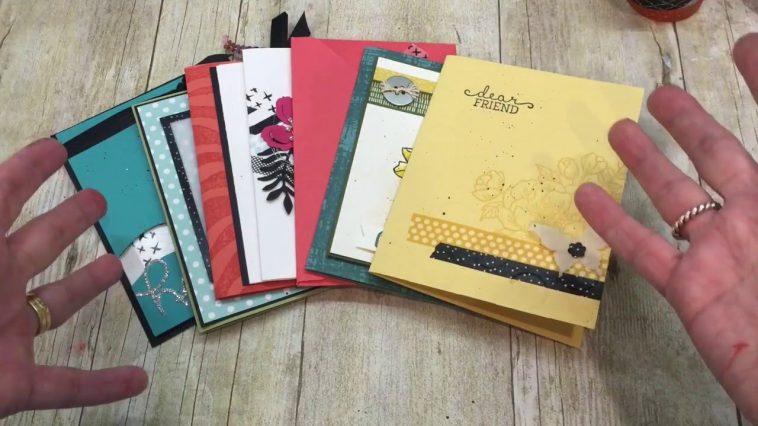
Washi tape has completely changed the way I approach cardmaking. Its vibrant patterns, gentle texture, and easy-to-tear design make it one of my favorite tools for adding flair without a lot of fuss. Whenever I’m working on a new greeting card, washi tape is never far from reach. It brings personality, polish, and a bit of playfulness to even the simplest layouts.
In this guide, I’ll walk you through how to use washi tape in cardmaking based on the techniques and styles I use most often. Whether I’m designing a minimalist card with a strip of metallic tape or layering florals for a bold effect, washi tape never lets me down. I’ll share my favorite ways to incorporate it, plus tips to avoid common mistakes and get clean, professional-looking results.
If you love paper crafts and want to add something fun and functional to your cardmaking routine, washi tape is a great place to start. Once you learn how to use washi tape in cardmaking, you’ll find yourself reaching for it again and again.
What Makes Washi Tape So Special
Washi tape is made from traditional Japanese rice paper, which gives it a translucent, matte finish and a delicate feel. Unlike plastic or foil tapes, it tears easily by hand and sticks well without damaging surfaces. That makes it perfect for paper-based crafts like handmade cards.
I especially love how many designs are available. From soft watercolor stripes and florals to bold geometrics, metallics, and holiday themes, the options are endless. Because washi tape comes in different widths, I can choose whether I want to make a big impact or add a subtle accent.
It’s also repositionable, which is a lifesaver during design. I can lay it down, see how it looks, and peel it up if I need to tweak the layout. It gives me creative freedom without commitment.
Tools I Like to Use with Washi Tape
To make sure my washi tape designs look polished, I keep a few simple tools nearby:
- A small pair of sharp scissors
- A bone folder or ruler for pressing down edges
- Cardstock in white, kraft, or colored tones
- A paper trimmer for straight card edges
- Tweezers for placing small embellishments
- Glue or tape runner for attaching layers
Washi tape doesn’t usually need glue, but if I use it as a background or layering piece, I sometimes add a dab of adhesive underneath the ends just to make sure it stays secure.
Designing Backgrounds with Washi Tape
One of my favorite ways to use washi tape is by creating backgrounds. This lets me make patterned paper from scratch without any printing or stamping. I usually start by choosing a color palette, like blush pink and gold, or navy and white, and pulling tapes that complement each other.
Then I lay them side by side, either vertically, horizontally, or diagonally. For crisp alignment, I use a ruler edge or grid mat to guide me. Once the background is done, I trim the edges and mount it onto my card base with a bit of foam tape for dimension.
Sometimes I alternate thick and thin strips, and other times I layer solid and patterned tapes for contrast. No matter the combination, it always adds texture and interest.
Framing and Borders
Washi tape also works beautifully as a frame. I’ll often take a plain card base and apply tape just along the outer edge to create a border. It draws the eye inward and helps the focal point stand out.
For this, I use narrow washi tape, about 5 to 7 millimeters wide. It gives just enough color without overpowering the design. Metallic or foil-finish tape works great for this technique, especially when paired with white or black card bases.
Framing with washi tape also gives me room to keep the center of the card minimal. Sometimes all I need is a stamped sentiment or a tiny embellishment, and the framed edges do the rest.
Washi Tape as a Focal Point
Sometimes, the tape itself becomes the star. When I find a really striking washi tape design, I like to make it the centerpiece. I’ll cut a rectangle or strip and place it in the center of the card, then layer a sentiment on top with vellum or cardstock.
For example, a floral washi tape laid on kraft paper with a hand-lettered thank-you message makes a beautiful finished card. The tape acts like printed art and sets the entire mood.
I’ve also used washi tape to create faux ribbon banners. I fold a strip over itself and cut a triangle out of one end to mimic a ribbon. Then I arrange several of them in a cluster, like a badge or medallion.
Making Striped Designs and Patterns
Washi tape is perfect for making stripes, grids, and geometric designs. One of my go-to patterns is a diagonal stripe made by layering tapes at a 45-degree angle across a piece of cardstock.
To do this, I choose tapes with varying widths and colors, then alternate them as I go. I like using this panel as a background behind a cutout or a die-cut shape, or trimming it into banners and flag elements.
Another technique is to create a plaid or crosshatch pattern. I lay several strips horizontally, then overlay vertical strips in a contrasting color. The result looks like printed paper but has that unique handmade touch.
Creating Faux Washi Tape Stickers
Sometimes I use washi tape to create my own stickers. I layer it onto a sheet of parchment or release paper, then punch or cut out shapes like hearts, stars, or circles. Once I’ve cut out the shapes, I peel them off and stick them onto my cards.
This is a fun way to make matching embellishments that blend seamlessly with the rest of the design. You can even stamp on the washi shapes using a waterproof ink for extra detail.
Highlighting Sentiments
When I want a stamped or printed sentiment to really stand out, I sometimes place it over a washi tape banner or use the tape as a base layer. I usually choose a light tape and then add a bold text block on top.
I also like underlining words with a strip of narrow washi tape. It gives just enough contrast to draw attention, without overwhelming the design.
If I want to add a modern or artistic edge, I use torn edges instead of clean cuts. The raw edge of washi tape gives cards a soft, organic look that works well with casual sentiments and watercolor backgrounds.
Layering with Other Embellishments
One of the best parts of learning how to use washi tape in cardmaking is discovering how well it plays with other materials. I often combine it with:
- Stamped images
- Die-cuts
- Embossed paper
- Stickers or enamel dots
- Thread or twine
Layering washi under or over these elements helps tie the whole card together. I also use washi tape to anchor photos or small tags on more scrapbook-style cards.
Mistakes I Try to Avoid
While washi tape is super forgiving, I’ve learned a few lessons over time:
- Avoid stretching the tape when applying. It may shrink back or wrinkle.
- Use sharp scissors for clean cuts. Tearing is great for texture but not always ideal for borders.
- Don’t use too many different patterns on one card. It can look cluttered quickly.
- If a design feels too busy, balance it with plenty of white space.
These little tips help me keep my cards elegant and focused, even when I’m using bright or bold tapes.
Cards I’ve Made with Washi Tape
Over the years, I’ve made all kinds of cards using washi tape. Here are just a few ideas that anyone can try:
Birthday Cards
I use colorful striped tape to create candles and add little flame shapes at the top. It’s quick, festive, and playful.
Thank You Cards
I like to create a soft pastel washi border and pair it with a handwritten or stamped message. A vellum overlay can add a nice touch of sophistication.
Holiday Cards
Red and green washi makes easy holiday backgrounds. I also make mini trees by layering strips of green tape in triangle shapes.
Congratulations Cards
Metallic washi tape gives cards a celebratory look. I often use gold or silver tape as a frame or behind a bold “Congrats” sentiment.
Organizing My Washi Tape Collection
I’ve built quite a collection over time, so I’ve learned how to keep it organized. I store my washi tape in clear containers sorted by color, which helps me grab what I need without digging. I also label some with seasonal tags like “winter,” “spring,” or “holiday.”
If I have leftover tape after a project, I stick a sample in a notebook with the name or set it came from. That way, I can reorder my favorites when they run out.
Final Thoughts
Learning how to use washi tape in cardmaking has opened up so many creative doors for me. It’s one of those tools that offers instant color and pattern, but it’s also flexible enough to fit any style. Whether I’m going for something minimal or layered and vibrant, washi tape helps bring my vision to life.
What I love most is how approachable it is. Anyone, regardless of their skill level, can create stunning designs using a few strips of washi tape and a bit of imagination. It’s affordable, accessible, and endlessly fun to use.
Next time you sit down to make a card, give washi tape a try. Start with a few simple stripes or a colorful border, and see where it takes you. With just a roll or two, you might find a whole new layer of inspiration waiting to unfold.



GIPHY App Key not set. Please check settings