

 Z
Z
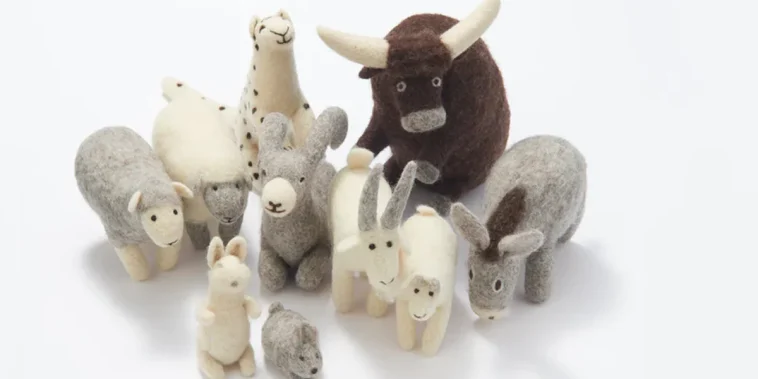
Felt is one of my go-to materials whenever I want to make something soft, colorful, and full of personality. It’s forgiving, easy to cut, and doesn’t fray. That makes it perfect for plush toys, especially when the goal is to create something charming and heartfelt. If you’ve been curious about how to make a felt animal plush toy, you’ll find it’s simpler than it looks and incredibly rewarding.
When I first discovered how versatile felt could be, I couldn’t resist the idea of making animals. From little foxes to sleepy sloths, each creation has its own unique appeal. The best part is that I get to customize every feature, from eye expressions to patterns and tiny accessories. Whether I’m making one as a gift or adding a new character to my collection, the process is always fun.
Supplies You Will Need
Before getting started, I gather all the essentials. I’ve learned that having everything ready in advance keeps the workflow smooth and focused. For felt plush toys, the materials are pretty straightforward:
- Felt sheets in various colors
- Fabric scissors
- Embroidery floss and needle
- Stuffing or polyester fiberfill
- Fabric glue or hot glue gun
- Pins or clips
- Pencil or fabric marker
- Template or pattern
- Optional embellishments like buttons, ribbons, or beads
Felt comes in different types and thicknesses. I prefer using wool blend felt for its softness and durability. It’s also more eco-friendly than some synthetic versions and holds stitches well without stretching.
Choosing a Design
Deciding what animal to make is one of the most exciting parts of the process. I often sketch a few ideas or search for templates online to inspire me. Popular choices include bunnies, cats, owls, bears, and dogs. Each animal presents its own creative possibilities.
If I want to gift the toy to a child, I think about what animals they like. For seasonal projects, I might go for themed characters like penguins for winter or chicks for spring. Once I settle on a design, I either draw it freehand or print a pattern to trace.
Templates are especially helpful when figuring out how to make a felt animal plush toy with symmetrical or layered parts. I save time and avoid guesswork by having a clear layout from the beginning.
Preparing and Cutting the Felt
Once I have my design, I trace each pattern piece onto the felt using a pencil or disappearing fabric pen. I make sure to label the front and back sides when needed, especially if the pieces aren’t identical. Then I cut them out carefully with sharp scissors, making slow and smooth cuts to keep the edges clean.
For animals with multiple layers, like a fox with a white belly or a panda with black patches, I keep the felt pieces organized by stacking them in order. Using pins or clips helps prevent them from shifting when I begin stitching.
Accuracy matters here. Even a slight misalignment can affect the symmetry of the plush toy. So I take my time and double-check each shape before moving on.
Assembling the Face First
The face is where most of the character’s personality comes through, so I usually begin there. I add the eyes, nose, mouth, and any small details like whiskers or freckles.
For eyes, I might use black felt circles, safety eyes, or simply embroider them with floss. Embroidery adds a hand-sewn charm that feels personal and detailed. I also like to use a satin stitch for noses and a backstitch for mouths.
Attaching the facial features to the front body piece first makes everything easier to manage. It’s much harder to embroider a face once the plush is stuffed, so I always handle this step early on.
Stitching the Toy Together
With the front and back pieces ready, I begin stitching around the edge of the toy. Blanket stitch is my favorite for plush projects because it creates a secure seam and looks decorative. A whip stitch or running stitch also works well for different styles.
I start stitching at the bottom, leaving an opening of about two inches to add stuffing later. If the toy has ears, tails, or arms, I sew them into place as I go. For some animals, like giraffes or dragons, I insert spikes or horns between the layers and stitch through them to hold them firmly.
When I learned how to make a felt animal plush toy, I realized that the secret to neat seams lies in even spacing and consistent tension. Pulling the thread too tight can bunch the felt, while loose stitches make the toy less durable. I use doubled embroidery floss and tie knots securely to keep everything in place.
Stuffing the Plush
Once most of the stitching is complete, it’s time to bring the animal to life. I gently push stuffing into the body, starting with small amounts and using a pencil or chopstick to reach narrow spots like limbs and ears.
The goal is to fill the plush evenly without overstuffing. Too much stuffing can cause seams to bulge or even break. I add enough to make it feel soft yet firm, especially if the toy is meant to be handled often.
After the toy is filled, I close the opening with the same stitch I used for the rest of the body, making sure the seam blends seamlessly with the rest.
Adding Accessories and Details
One thing I love about making felt plush animals is adding the final touches. These little extras really make each toy unique. I’ve sewn on bow ties, hats, scarves, and even tiny glasses. Ribbons can become collars, and buttons can be eyes or embellishments.
If I’m making a plush for a holiday gift, I might dress it in festive colors or attach a mini heart, star, or snowflake. Personalizing it with initials or names is also a thoughtful way to make the toy feel special.
Sometimes I glue on felt flowers, patches, or wings to give the plush an extra layer of creativity. I always make sure any glued pieces are securely fastened, especially if the toy is for a child.
Displaying or Gifting the Finished Plush
After finishing the plush, I take a moment to admire the result. Whether it’s a chubby bunny or a sleepy bear, seeing it fully assembled never gets old. If it’s a gift, I wrap it in tissue paper and place it in a small box or decorative bag.
These felt animal plush toys make wonderful presents for birthdays, baby showers, holidays, or just because. They can also be turned into ornaments, keychains, or nursery decor by adjusting the size and adding loops or hooks.
When I make them for craft fairs or small sales, I add tags with care instructions and details about the materials used. Many people appreciate knowing the item is handmade and stitched with intention.
Common Mistakes and How to Avoid Them
Learning how to make a felt animal plush toy came with some challenges. I’ve had seams pop open, mismatched ears, and even faces that looked more scary than cute. But each mistake taught me something valuable.
One early issue I had was cutting pieces unevenly. Now, I always trace carefully and cut slowly. I also struggled with stuffing too much, which stretched the seams. These days, I stuff gradually and smooth the surface as I go.
Another lesson came from using cheap felt. While budget-friendly options work for practice, higher-quality felt makes a big difference in appearance and durability. The same goes for needles and thread. Investing in proper tools has saved me time and frustration.
Tips for Creating a Variety of Animals
Once you’ve made one plush animal, it becomes easier to create variations. I use a basic body template and adjust the ears, tails, and faces to create new characters. For instance, changing the ears from long and floppy to short and pointy can turn a rabbit into a cat.
Here are some ways I modify my designs:
- Add a snout or muzzle for dogs and bears
- Use different eye styles, such as sleepy or wide-eyed
- Attach wings to create owls or mythical creatures
- Add stripes or spots using felt patches
- Stitch on facial expressions like eyebrows or blush marks
By experimenting with features, I’ve built a little zoo of handmade toys, each with its own charm.
Making Toys with Kids
Felt animal plush toys are also a great project to do with children. I often simplify the designs for younger crafters by pre-cutting the felt and using fabric glue instead of needles. Kids can pick the colors, assemble the parts, and draw on faces with fabric markers.
This turns the project into a collaborative and educational experience. It helps teach sewing basics, pattern recognition, and fine motor skills. Plus, the joy they get from seeing their animal come to life is always worth the effort.
Why Felt Plush Toys Are Timeless
In a world filled with plastic and mass-produced toys, felt plushies offer something more meaningful. They reflect care, creativity, and a bit of imagination stitched into every inch. Knowing how to make a felt animal plush toy lets me create one-of-a-kind gifts that connect more deeply with others.
Even simple designs feel magical when made with intention. Whether they sit on a shelf, hang from a mobile, or ride in a child’s backpack, these little creatures often become cherished companions.
Now that you know how to make a felt animal plush toy from start to finish, all that’s left is to pick your animal and get started. The process might take a few tries to master, but it’s incredibly fun and endlessly creative. Let each stitch tell part of the story and don’t be afraid to make it your own.
If you’d like, I can create a downloadable pattern to match this guide or help you plan themed plush toys for holidays or events. Just let me know!


GIPHY App Key not set. Please check settings