

 Z
Z
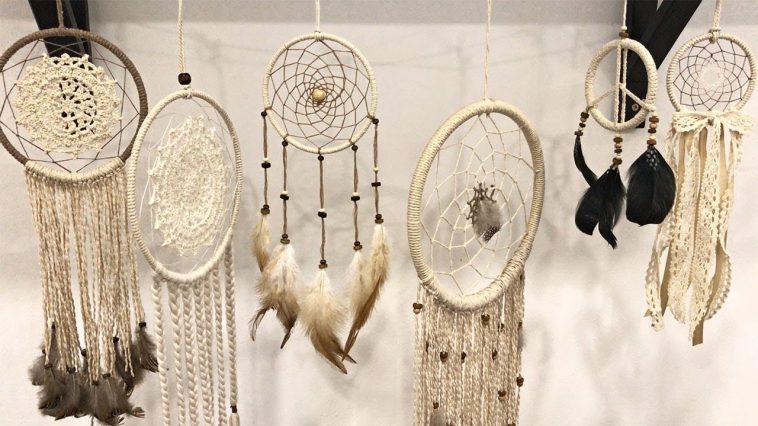
Dreamcatchers have always fascinated me. Their soft loops, intricate webs, and flowing feathers give off such a peaceful, bohemian charm. Whether they’re hanging above a bed or displayed on a cozy wall, they bring beauty and intention into any space. If you’ve ever wanted to make one yourself, learning how to make a DIY dreamcatcher is a great way to explore creativity, use up some craft supplies, and add something meaningful to your home or gift list.
The beauty of a dreamcatcher lies in both its form and symbolism. Traditionally rooted in Native American culture, dreamcatchers are believed to catch bad dreams in their web, letting only the good ones pass through to the sleeper. The feathers act as a ladder, gently guiding dreams down to the resting mind. While the ones I make now are more decorative than spiritual, I always take care to show respect for their origins and try to craft mine with intention and gratitude.
In this guide, I’ll walk you through how to make a DIY dreamcatcher from scratch, using simple materials you may already have. Whether you want to make a gift, a wall hanging, or a calming piece for your bedroom, this is a relaxing and rewarding project to try.
Materials You’ll Need
Before diving in, I always like to lay out my materials. It helps to have everything ready so the process flows naturally.
Here’s what I use every time I make a dreamcatcher:
- A metal or wooden hoop (embroidery hoops work well)
- Yarn, twine, or suede lace for wrapping the hoop
- Embroidery thread or waxed cord for the web
- Beads of various sizes
- Feathers, charms, or fabric strips
- Hot glue gun or craft glue
- Scissors
- Optional: artificial flowers or lace trim
Most of these supplies can be found at any craft store, and the rest can usually be repurposed from home. I’ve even made dreamcatchers with thrifted jewelry, leftover ribbon, and natural feathers I found on a walk.
Wrapping the Hoop
The first thing I do is wrap the hoop to create a smooth, colorful base. This part is optional, but it gives a finished, cohesive look that I really enjoy.
I tie the yarn or suede lace tightly to the hoop with a secure knot, then begin wrapping it all the way around, making sure the layers are tight and even. I take my time to avoid gaps. If I run out of material, I simply knot the end, start again with a new piece, and keep wrapping. When I reach the end, I knot it again and glue the tail down with a dab of hot glue.
This wrapped frame becomes the foundation for the web and decorations, so it’s worth doing carefully. If I want to add a rustic touch, I sometimes skip wrapping and leave the wood or metal bare, especially if it has a nice finish.
Weaving the Web
The next step in how to make a DIY dreamcatcher is to create the web. This is the most iconic part of the dreamcatcher, and though it may look complicated, it’s surprisingly easy once you get the rhythm down.
I start by tying my thread to the top of the hoop with a double knot. From there, I loop the thread along the inside edge of the hoop, about one or two inches apart. I continue this pattern all the way around, pulling the thread tightly but not so tight that it bends the hoop. When I reach the starting point, I begin looping through the middle of each segment I just created, pulling the thread slightly inward each time.
With each round, the web grows smaller and begins to take shape. After a few layers, I like to add a bead or two by threading them onto the string and working them into the pattern. These beads represent good dreams or spiritual protection, depending on your interpretation.
Once the web reaches the center, I tie it off with a small knot and secure it with a tiny drop of glue if needed. The end result should look like a spider web, symmetrical and balanced but with a handmade charm.
Adding Beads and Feathers
Now comes my favorite part, decorating the bottom of the dreamcatcher. I usually cut several lengths of string, ribbon, or lace and attach them to the bottom half of the hoop. I fold them in half and use a lark’s head knot to secure them, or I just glue them on if I want a cleaner look.
Next, I slide beads onto some of the strings, adding wooden, glass, or metallic accents for texture. At the ends of the strings, I glue on feathers in matching or contrasting colors. I sometimes layer the feathers or pair them with fabric strips for a fuller appearance.
The materials I choose depend on the vibe I want. Soft pastels with white lace give a dreamy, romantic feel, while bold colors and chunky beads make a boho statement. For nature-themed designs, I go with earth tones, twine, and real feathers. Adding small charms or crystals is also a great way to personalize the piece.
Making It Meaningful
When I’m working on how to make a DIY dreamcatcher for a specific person, I always think about what they love. If it’s a birthday gift, I include their favorite colors or symbols that mean something to them. If it’s for a baby shower, I might go with soft tones and little animal charms.
Including intention in each step, like weaving in positivity or peace, makes the finished dreamcatcher feel extra special. I believe handmade gifts carry that quiet energy, especially when thoughtfulness is woven into every knot and feather.
Hanging Your Dreamcatcher
Once I finish decorating, I add a loop of string to the top of the hoop for hanging. I usually make sure it’s centered and tied securely. Dreamcatchers look best when hung where they can catch light and air. I often place them near a window, on a bedroom wall, or above a reading nook.
If I’m giving the dreamcatcher as a gift, I package it in tissue paper and add a handwritten tag explaining the symbolism. People always appreciate the meaning behind the design, and it turns a simple handmade item into something personal and heartfelt.
Variations to Try
Once you’ve learned how to make a DIY dreamcatcher, the possibilities really open up. Every project can look completely different depending on the materials and layout. Here are a few variations I’ve enjoyed making:
Mini dreamcatchers – Perfect as car charms, keychains, or party favors. I use small hoops or even metal rings from old jewelry.
Double hoop dreamcatchers – Two overlapping hoops create a unique layered effect. I add a smaller dreamcatcher inside a larger one or link two side by side.
Nature-inspired designs – I use sticks, vines, leaves, or dried flowers to create a rustic look. These feel earthy and calming.
Color-themed creations – Using monochromatic materials makes a sleek, modern version that fits any room décor.
Fabric-wrapped hoops – Instead of thread, I use strips of fabric to create a cozy, homespun vibe.
Each variation gives the classic dreamcatcher a new twist, and I love how different they can all look while still feeling familiar.
Tips for Better Results
After making many dreamcatchers, I’ve picked up a few tips that make the process smoother:
- Keep your hoop stable while weaving by taping it to a table or holding it between your knees.
- Use a long length of thread to avoid tying new pieces mid-web.
- Don’t stress about perfection. A slightly wonky web adds handmade character.
- Pre-sort your beads and feathers to keep your rhythm flowing.
- Take your time with wrapping and weaving. It’s a calming process, not a race.
Mistakes can always be fixed. If my web looks off, I undo a few loops and adjust. If I tear a feather, I replace it with a new one. That’s the joy of handmade work, each project is its own journey.
Why Dreamcatchers Make Great Gifts
Learning how to make a DIY dreamcatcher has allowed me to create some of the most meaningful gifts I’ve ever given. They’re personal, beautiful, and carry layers of symbolic meaning. I’ve gifted dreamcatchers for birthdays, weddings, graduations, and baby showers.
Since each one can be tailored to the recipient’s style, it feels like giving them a piece of your creativity and good wishes. They also display beautifully, so they serve both as decoration and a gentle reminder of your connection.
Dreamcatchers also work well as classroom or group projects, because everyone can put their own spin on the same steps. I’ve made them with friends during craft nights and with kids as a calming art activity. They always spark conversation and appreciation.
Final Thoughts
Now that you’ve followed along on how to make a DIY dreamcatcher, I hope you feel excited to try it out. Whether it’s your first time or your tenth, the process is always calming, creative, and deeply satisfying.
With just a few materials and a little time, you can create something beautiful and meaningful. Each dreamcatcher tells its own story, woven with care and adorned with your personal style. And when you hang it on the wall or give it away, you’ll know that what you made is one of a kind.
I always enjoy how these projects give me a quiet space to slow down and focus. If you try this craft, you might find that, like me, you’re not just making something decorative, you’re weaving a little more peace into your day.



GIPHY App Key not set. Please check settings