

 Z
Z
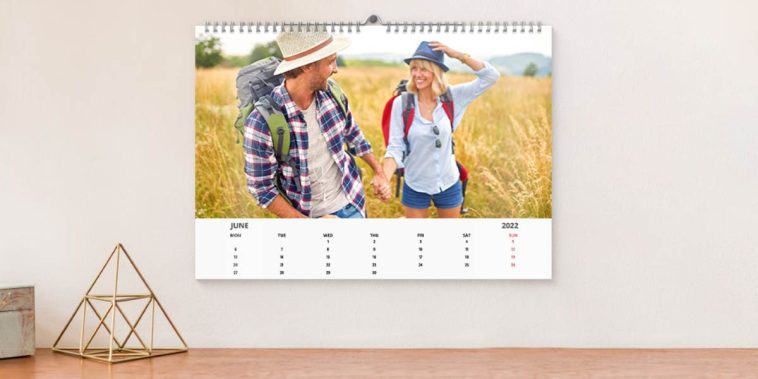
Creating something meaningful by hand has always brought me joy, especially when it can be both functional and beautiful. One of my favorite projects that blends creativity, utility, and sentimentality is a handmade calendar. Learning how to make a personalized calendar by hand gave me a way to celebrate memories, commemorate important dates, and offer one-of-a-kind gifts that truly stand out.
This type of project lets me control everything from the colors and layout to the photos, notes, or even inspirational quotes that I include. Whether I’m putting it together for my own wall, for a friend’s birthday, or as a year-end holiday gift, the process feels both intentional and therapeutic. If you’ve ever wanted to design something custom that speaks to your own rhythm or someone else’s life journey, this guide will walk you through exactly how to make a personalized calendar by hand.
Deciding on the Calendar Style
The very first step I take is figuring out what kind of calendar I want to make. The options are surprisingly wide. I’ve made wall calendars that hang vertically, desk calendars that sit on little easels, and even mini flip calendars that are compact enough for a nightstand or kitchen shelf.
Each format has its own appeal. Wall calendars offer lots of room for decoration and writing. Desk calendars are cute and practical. Flip calendars are especially fun for counting down to events like birthdays or holidays. Once I’ve chosen the format, I decide on the size. I typically go for 8.5 by 11 inches for wall calendars, but I’ve also used card-sized pages when I want to make something portable.
Gathering Materials
To get started, I gather the following supplies:
- Blank cardstock or heavy-weight paper for the base pages
- A ruler, pencil, and eraser
- Markers, pens, colored pencils, or watercolor paints
- Adhesive like glue sticks, double-sided tape, or photo corners
- Scissors and a paper cutter
- Photos, magazine clippings, washi tape, or stickers
- Hole puncher or binding rings
- Templates or a printed monthly calendar layout
For wall calendars, I also use a small binder clip or metal rings to keep the pages together. When I want a more refined finish, I bind them at a local print shop with a spiral coil.
Creating the Monthly Grids
The calendar grid is the most functional part of the design. I either draw each grid by hand using a ruler or print pre-made blank grids and glue them onto my decorative pages.
If I’m doing it by hand, I leave space for the month’s title and enough room in each day box to write events or appointments. I try to keep the layout consistent across the months so the overall design feels cohesive.
Adding birthdays, anniversaries, and personal holidays directly onto the grids is one of the most satisfying parts. It’s where the calendar shifts from generic to truly personal. I also like to highlight special weekends or school breaks using colored borders or stickers.
Adding Decorative Elements
Now comes the fun part, making each page reflect the month’s spirit. For January, I use snowflakes, cool colors, and new year quotes. For February, hearts and warm reds take center stage. I let the seasons guide my themes but always add a personal twist. Maybe for April, I’ll include a little drawing of my favorite rain boots or a pressed flower from last year’s garden.
The beauty of learning how to make a personalized calendar by hand is that the details don’t have to be perfect, they just have to feel meaningful. I add:
- Hand-drawn doodles in the corners
- Washi tape to frame photos
- Stickers or rubber stamps for visual texture
- Photos that correspond to special moments or places
- Motivational quotes or inside jokes written in fun lettering
By the end, each month becomes a tiny mixed-media artwork. If I’m giving it as a gift, I even sneak in photos or notes that reflect shared memories.
Personalizing Each Month
Personalization is what transforms the calendar from decorative to deeply memorable. I try to think of ways each month reflects either my experiences or the life of the person I’m making it for. That could mean:
- A picture of a beach trip in July
- A drawing of pumpkins for October
- A note that says “Don’t forget Grandma’s birthday” in March
- A quote that reminds me of a big change or decision made that month
Even the handwriting style and ink color I use are chosen with intention. I want the calendar to feel like a letter written across twelve pages.
Binding the Calendar
Once all twelve months are complete, I bring everything together. I punch holes at the top or left-hand side of each page and secure them with rings or ribbon. For a sleeker finish, spiral binding works wonders. If I’m making a flip calendar, I use small binder rings and a firm base like chipboard to make it stand upright.
If I’m short on time, I’ll sometimes use a large bulldog clip and hang the calendar from a nail. It’s a simple and rustic display option that works especially well for farmhouse or vintage-style themes.
Creative Variations I’ve Tried
One of the best things about learning how to make a personalized calendar by hand is that there are countless variations. Here are a few I’ve experimented with:
Photo-Based Calendars
Each month features a full-page photo, with the date grid either layered below or added separately. These work beautifully when made from family snapshots or travel images.
Coloring Calendars
I draw each month’s illustrations in black and white and leave them blank for coloring. This interactive version is a big hit with kids or anyone who enjoys coloring as a form of relaxation.
Quote Calendars
I center the layout around inspirational or spiritual quotes. These are ideal for friends who enjoy journaling or daily reflection.
Sticker-Interactive Calendars
I include a sheet of custom-made stickers that can be applied to the calendar throughout the year. This adds an element of surprise and interactivity.
Mini Calendar Magnets
By shrinking the monthly layouts to small squares, I make calendar magnets that stick on the fridge. These are especially fun for stocking stuffers.
Tips That Make the Process Easier
After making several versions, I’ve picked up a few tips that help things go smoothly:
- Use a light pencil first: I lightly sketch all layouts before committing with ink or color.
- Create a template: I make one master template for the grid and trace it twelve times to ensure consistency.
- Print small calendar blocks: When short on time, I print small monthly calendars and focus my energy on decorating the page around them.
- Design in batches: Working on three or four months at a time helps me stay focused without burning out.
- Keep the pages flat: I place a heavy book on top of the finished pages overnight so that glue and paint don’t cause warping.
Why Handmade Calendars Make Great Gifts
A handmade calendar is one of those rare projects that feels just as good to give as it does to make. When I give one as a gift, I often hear back months later that it brought a smile to someone’s face or helped them feel more connected throughout the year.
It’s more than a calendar, it’s a reminder that someone took time to think about the recipient all year long. Each page becomes a little pause, a small surprise, or a reason to reflect. And with so many digital tools around us, the tactile experience of flipping a calendar page or seeing handwritten notes adds something deeply personal.
A Month-by-Month Themed Inspiration Guide
To help get the ideas flowing, here’s a list of seasonal and emotional themes I’ve used:
- January: Fresh starts, snow scenes, sparkle and frost
- February: Love, friendship, self-care
- March: Growth, spring blooms, green tones
- April: Rain, renewal, poetry, pastels
- May: Garden flowers, picnics, sunshine
- June: Adventure, school’s out, camping trips
- July: Freedom, fireworks, beach days
- August: Harvest beginnings, golden light
- September: Books, apples, cozy vibes
- October: Leaves, pumpkins, mystery
- November: Gratitude, family, comfort food
- December: Celebration, snowflakes, twinkle lights
Each theme helps guide my decorations, quotes, and color palette.
Final Thoughts
Learning how to make a personalized calendar by hand has become one of my most rewarding creative traditions. It blends memory keeping, functional design, and heartfelt gift-making in a way that feels timeless. Each year, I look forward to setting aside quiet time to reflect, decorate, and make something that captures the spirit of the months ahead.
Whether you’re making it for yourself or someone else, the act of handcrafting a calendar offers more than organization, it offers connection. And with every flip of the page, that connection is rekindled.


GIPHY App Key not set. Please check settings