

 Z
Z
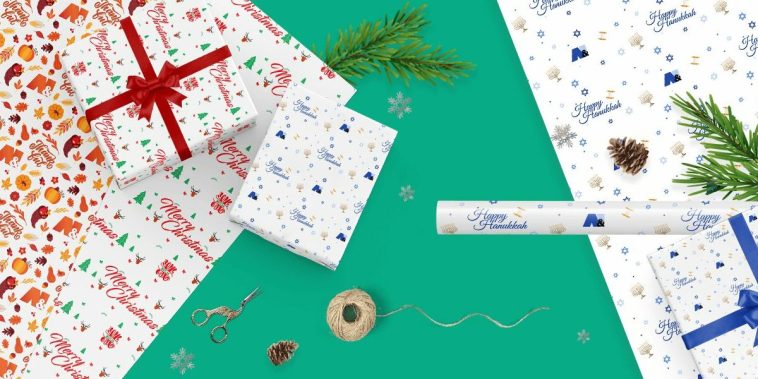
Gift-giving is one of my favorite ways to connect with others, and I’ve found that the presentation of a gift can be just as meaningful as what’s inside. A beautiful package signals thoughtfulness, creativity, and care. Over the years, I’ve started making my own wrapping paper, and it’s completely changed the way I prepare gifts. Learning how to make your own gift wrapping paper has added a personal touch that store-bought paper just can’t match.
This project has become a joyful part of my gifting process. It gives me the freedom to play with colors, textures, and styles that match both the gift and the person receiving it. Whether it’s for birthdays, holidays, weddings, or just because, making your own wrapping paper turns even the simplest present into a work of art. It’s cost-effective, eco-friendly, and most of all, it gives the gift a story before it’s even opened.
Materials You Can Use at Home
One of the best parts of learning how to make your own gift wrapping paper is realizing how many supplies you already have on hand. I often use:
- Plain kraft paper or butcher paper
- White or brown packing paper
- Newspaper pages
- Old maps or book pages
- Tissue paper
- Paper bags, cut and flattened
These make the perfect blank canvas for decoration. They’re also much more durable than flimsy commercial wrapping paper, so they handle embellishments and folds easily. I sometimes mix and match different bases depending on the occasion or recipient.
Hand-Stamped Patterns
One of my favorite techniques is hand-stamping. I carve my own stamps from rubber blocks or potatoes and dip them into acrylic paint or ink pads. You can also buy inexpensive stamps with seasonal designs, floral motifs, or geometric shapes.
Once the base paper is laid out on a flat surface, I repeat the pattern in even rows or random clusters. Red hearts for Valentine’s Day, snowflakes for Christmas, or sunbursts for summer birthdays, the design possibilities are endless. To finish the look, I let the paint dry completely before wrapping.
This method is fast, fun, and a great way to get kids involved. They love stamping and seeing their designs come to life, and the paper ends up looking vibrant and unique.
Painted Brush Strokes
When I want a more abstract or artsy design, I use paintbrushes and watercolors or acrylics to add colorful strokes across my paper. Wide brushstrokes give a bold, contemporary feel, while light watercolor washes look soft and romantic.
Sometimes I stick with one color palette, like shades of blue or pink, and other times I mix multiple bright colors for a cheerful surprise. This works well with white packing paper or tissue paper, and the result is always eye-catching. I let the paper dry thoroughly, roll it up, and save it for the next gift.
Nature-Inspired Prints
Bringing nature into gift wrapping adds a rustic, handmade feel. I’ve used leaves, ferns, pine needles, and even flowers to make botanical prints. I press the item into paint, then carefully stamp it onto the paper. The result looks like a hand-drawn sketch but with an organic touch.
Another approach is to use the leaves like stencils. I place them on the paper, spray lightly with paint, then remove the leaf to reveal a silhouette. These prints are perfect for eco-conscious gifts or seasonal occasions like autumn birthdays or spring weddings.
Recycled Paper Collages
Instead of buying new materials, I often turn to my recycling bin. Magazine pages, junk mail, and catalog clippings can be torn and glued into layered collages. I stick to a theme like “red and gold,” “nature textures,” or “vintage typography,” and cover a large sheet of paper.
Once the collage is finished, I let it dry, then cut it down to size for smaller gifts. The result feels textured and rich, and no two pieces are ever the same. Learning how to make your own gift wrapping paper with collage techniques is a great way to reuse materials and add visual interest.
Calligraphy and Hand Lettering
Another elegant option is to use calligraphy or simple hand lettering directly on the paper. I write phrases like “Happy Birthday,” “With Love,” or “Just for You” in rows or curves across the surface using permanent markers or metallic pens.
This technique works especially well with solid-color papers like black or kraft brown. I sometimes add swirls, stars, or vines to fill in gaps. The combination of handwriting and decorative elements makes the wrapping feel truly personal.
Polka Dots and Paint Splatters
If I need to whip up wrapping paper quickly, I grab a pencil eraser and dip it in paint to create polka dots. It’s fast, festive, and easy to customize. I alternate colors or stick to a single hue, depending on the gift’s occasion.
For an even more spontaneous look, I flick paint from a toothbrush or brush across the paper for a splatter effect. It dries quickly and looks like modern art. This style works great for kids’ gifts or anything that calls for a playful tone.
Stenciled Designs
Stencils are a great tool for neat and repeatable patterns. I create my own stencils from cardstock or plastic sheets using scissors or craft knives. Shapes like stars, trees, hearts, or geometric lines work best.
Once I’ve taped the stencil in place on my paper, I use a sponge or roller to apply paint. When the stencil is removed, the crisp design underneath is always satisfying to see. These patterns give the paper a polished, professional feel.
String Printing
One of the more unusual methods I’ve enjoyed involves string or yarn dipped in paint. I lay the paint-covered string in squiggly patterns across the paper, then press down lightly with another sheet of paper before pulling the string away.
This creates beautiful, symmetrical designs that resemble marbling or wave patterns. It’s an experimental process, but it often yields stunning results. I’ve used this method for special event wrapping like anniversaries or milestone birthdays.
Personalized Photo Prints
When I want the paper to be more about the person than the design, I print black-and-white or sepia-tone photos onto large sheets of paper. I use images of family vacations, baby pictures, or even scanned drawings from kids.
These photo-based wraps are ideal for milestone gifts. I love seeing people’s faces light up when they realize the paper itself tells a story. It makes unwrapping part of the memory-making.
Reusable Wrapping with Fabric
If I’m making paper for someone who values sustainability, I often turn to fabric wrapping techniques inspired by Japanese furoshiki. I select square pieces of cloth, often repurposed scarves, handkerchiefs, or fabric remnants, and use them to wrap gifts with folding and knotting techniques.
Even though it’s technically not paper, this method aligns beautifully with the spirit of learning how to make your own gift wrapping paper. The recipient can reuse the fabric, making it a gift within a gift.
Adding the Finishing Touches
Once the custom paper is finished, it’s time to add embellishments that elevate the final look. Here are some of the accents I love to use:
- Twine, ribbon, or raffia
- Handmade tags
- Sprigs of rosemary, pine, or dried flowers
- Small bells, buttons, or charms
- Wax seals
- Stamped wooden tags
These extras help tie the whole presentation together. I keep a box of random trimmings and dig into it whenever I’m wrapping. With handmade paper, even the simplest accessories shine.
Making It a Family Activity
One of the most rewarding aspects of learning how to make your own gift wrapping paper is sharing the process with loved ones. I often invite my family to join in. We spread out large sheets on the dining table and everyone contributes their own patterns, messages, or doodles.
This turns gift prep into a fun memory of its own. The final paper feels infused with personality and love. It’s a tradition I plan to continue for years to come.
Why Handmade Wrapping Matters
Creating your own wrapping paper slows the rhythm of the holiday rush. It allows room for creativity, for thoughtfulness, and for expressing affection beyond the item inside the box. When I hand someone a gift wrapped in paper I designed just for them, I know I’m giving more than just a present, I’m giving a gesture that says they matter.
The process isn’t just about crafting, it’s about storytelling. Whether it’s the choice of paper, the color scheme, or the stamped message across the front, every detail becomes part of the conversation between giver and receiver. In a world full of fast, impersonal options, taking the time to make something by hand speaks volumes.
Final Thoughts
Learning how to make your own gift wrapping paper has completely changed the way I approach gift-giving. It’s not just a craft project, it’s a celebration of creativity, connection, and care. Whether I’m using stamps, paint, photos, or fabric, the experience of designing personalized paper is always satisfying.
The best part is that no two sheets are ever the same. Each one reflects the season, the person, and the story behind the gift. So next time you’re wrapping presents, consider skipping the store and creating something from your heart instead. You’ll be surprised at how much joy a simple sheet of paper can hold.

GIPHY App Key not set. Please check settings