

 Z
Z
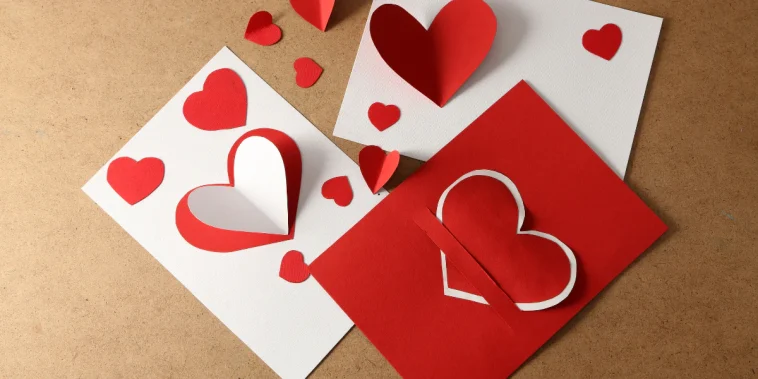
DIY watercolor greeting cards for beginners are one of the most satisfying ways I like to blend art and heartfelt sentiment into a simple, handmade gift. Unlike store-bought cards, watercolor cards are personal, beautiful, and allow me to explore creativity without needing to be a master artist. Even with just a few tools and some basic techniques, these cards can look elegant, artistic, and thoughtful enough to impress anyone.
Watercolors have a soft and dreamy look that makes them perfect for expressing warmth and emotion. Whether I’m painting florals, soft gradients, or playful abstract designs, I’ve found that watercolor cards add something extra to birthdays, thank-you notes, or just-because messages. The best part is how easy they are to make, even if you’ve never touched a brush before.
In this guide, I’ll walk through everything I’ve learned about creating DIY watercolor greeting cards for beginners. From picking supplies and practicing brush techniques to painting designs and adding the finishing touches, I’ll cover all the basics to get you started with confidence.
Materials You Need to Get Started
You don’t need a studio full of supplies to begin making DIY watercolor greeting cards for beginners. I like to keep it simple, especially when starting out. Here’s what I typically gather before I start painting:
- Watercolor paints, either in pans or tubes
- Watercolor paper or blank watercolor cards
- A palette or mixing tray
- Brushes in small and medium sizes
- A jar of clean water
- Paper towels or a cloth
- Painter’s tape
- Pencil and eraser
- Fine-tip pen or marker for details
- Optional: metallic watercolor paints for accents
Watercolor paper is especially important. Regular printer paper will buckle or tear. I prefer cold-pressed 140 lb watercolor paper for a good balance of texture and thickness.
Preparing Your Card
To make the base for each card, I cut a sheet of watercolor paper into 10 by 7 inches, then fold it in half to create a 5 by 7 inch card. You can also buy pre-cut and folded watercolor cards, which save time and come with envelopes.
Before I start painting, I tape the edges of the card to a flat surface using painter’s tape. This holds the card in place and creates a clean white border once the tape is removed. It also helps prevent the paper from warping while it dries.
I lightly sketch out my design using a pencil. Nothing too detailed, just a rough outline of shapes or layout so I know where I’m headed.
Practicing Simple Brush Techniques
Since DIY watercolor greeting cards for beginners are meant to be accessible, I like to warm up with basic strokes and blending exercises. These help me get comfortable with how the paint flows and how water changes the intensity.
Here are a few techniques I often use:
- Flat wash: Wetting an area and filling it with an even color. Great for backgrounds.
- Wet-on-wet: Dropping paint onto a wet surface for soft blends and natural gradients.
- Wet-on-dry: Painting on dry paper for more defined shapes and edges.
- Dry brush: Using very little water to create a textured, brushy look.
- Splatter: Flicking a brush for a fun, confetti-like texture.
Practicing these before working on the actual card helps me stay loose and confident. I remind myself that watercolor is unpredictable, and that’s part of the charm.
Painting Simple Backgrounds
One of my favorite ways to make DIY watercolor greeting cards for beginners is to start with soft, abstract backgrounds. These don’t require perfect technique but still look beautiful and intentional.
Some go-to background styles I use:
- A gradient wash from one color to another
- A rainbow blend across the card
- Light washes of blue and purple for a sky-like feel
- Random color patches with white space between
- A circular burst of color fading outward
Once dry, I can layer simple elements like lettering, silhouettes, or small illustrations on top. The background gives depth and texture, even for very simple designs.
Painting Floral Elements
Florals are some of the most popular themes for handmade watercolor cards, and I love how forgiving they are. Even abstract flower shapes can look great with watercolor’s soft edges and blends.
To paint a basic floral design, I use these steps:
- Use a medium round brush to paint petal shapes with watery color.
- Let the petals blend naturally. Don’t worry about being precise.
- Drop in a bit of a darker shade at the base of each petal while still wet.
- Add stems and leaves using a smaller brush and green shades.
- Let everything dry, then outline softly with pen if desired.
I often combine a few flowers with leafy stems or filler elements like dots and swirls. This creates a bouquet effect without needing exact details.
Adding Lettering or Messages
Once the paint has dried completely, I add a greeting or sentiment to the card. A simple phrase can go a long way. Some of my favorite messages to write include:
- Happy Birthday
- Thank You
- Thinking of You
- Get Well Soon
- You’re the Best
- Just a Note
I use a fine-tip waterproof pen for clean lines. If I want fancier lettering, I either hand-letter it with a brush pen or use stamps. Watercolor brush lettering is beautiful but takes some practice, so I usually stick with simple block or cursive letters when I’m short on time.
Sometimes I write the message first in pencil to plan the spacing, then trace over it with ink once I’m sure of the placement.
Using Masking for Fun Effects
To take a card up a notch, I sometimes use masking techniques. Masking fluid is a liquid that temporarily covers parts of the paper so they stay white when painted over. Once dry, I peel it off and the clean space underneath adds contrast.
One technique I enjoy is writing “hello” or a name with masking fluid in the center of the card, then painting a colorful wash over it. After removing the masking, the word pops out in white. It’s simple but has a wow effect.
You can also use masking tape to create geometric designs or block out borders for neat layouts.
Finishing Touches
Once the painting and lettering are done, I remove the painter’s tape slowly to reveal a crisp edge. This always gives the card a polished, professional finish. If the paper has warped a little, I place it under a heavy book overnight to flatten it.
For a little sparkle, I sometimes add metallic watercolor details, gold dots in a floral center or silver stars in a night sky. A little shimmer can really elevate a card, especially for festive occasions.
I make sure to sign the back of each card with my initials or name. Handmade cards are tiny pieces of art, and it feels good to own that.
Mistakes That Taught Me Something
Over time, I’ve made plenty of watercolor mistakes that turned into lessons. Here are a few things I’ve learned that might help other beginners:
- Too much water makes colors muddy or overly pale. It’s better to build layers gradually.
- Cheap paper buckles easily. Investing in decent watercolor paper makes a huge difference.
- Rushing drying time leads to unwanted blends and smears. I now let each layer dry fully before continuing.
- It’s okay if the design doesn’t look exactly like the idea. Watercolor does its own thing, and that’s part of the beauty.
Even cards that didn’t turn out the way I expected still had charm once I added a thoughtful message and envelope.
Card Ideas for Different Occasions
DIY watercolor greeting cards for beginners work beautifully for almost any event or reason. I often use the following themes depending on who I’m making the card for:
- Birthdays: Balloons, cakes, or floral wreaths with bright backgrounds
- Thank-you notes: Leaves, hearts, or soft gradient backgrounds with elegant lettering
- Congratulations: Abstract color bursts with bold lettering
- Sympathy or encouragement: Calm blue or lavender washes with simple messages
- Seasonal cards: Snowflakes, autumn leaves, cherry blossoms, or sunshine rays
Because these cards are blank inside, I can write a custom message for each recipient. That personal touch adds more warmth than any store-bought card could.
Packaging Your Finished Cards
When I finish a batch of cards, I store them in clear protective sleeves or a small box so they stay clean and ready to use. For gifts, I bundle a few different cards together with twine and add a small tag that says “Handmade with love.”
I’ve given sets of DIY watercolor greeting cards for beginners as teacher gifts, holiday gifts, or hostess thank-yous. People always appreciate the effort and love the idea of having beautiful cards on hand when they need one.
Why Watercolor Cards Make Great Gifts
Beyond being a fun creative project, these cards also serve as heartfelt gifts all by themselves. Each one reflects time, thought, and intention, something you don’t get with generic stationery. They’re also easy to customize for the person you’re thinking of.
I’ve seen friends frame watercolor cards or keep them tucked into journals. It’s always nice to know that what began as a relaxing painting session ended up making someone else smile.
Final Thoughts
DIY watercolor greeting cards for beginners offer the perfect balance between creativity and simplicity. They don’t require expensive materials or advanced skills, just a little patience and a willingness to play with color.
Every time I make a watercolor card, I feel more confident with my brushstrokes and more in tune with my own artistic voice. Each design, no matter how simple, feels like a small celebration of creativity and connection.
If you’ve been wanting to explore watercolor but weren’t sure where to start, making greeting cards is a gentle and joyful way in. You’ll learn by doing, create something beautiful, and brighten someone’s day, all with a brush, some paint, and a blank sheet of paper.

GIPHY App Key not set. Please check settings