

 Z
Z
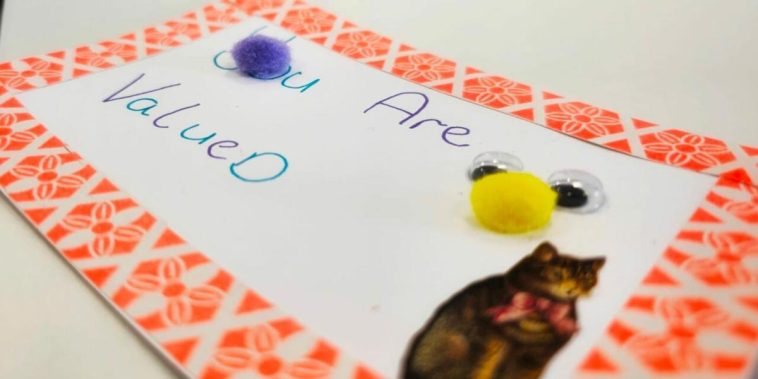
Thank you cards are more than a polite gesture, they’re a powerful way to let someone know you appreciate them. Creating DIY thank you cards with a personal touch has become one of my favorite ways to express gratitude in a meaningful and memorable way. Unlike store-bought cards, handmade ones speak volumes with their colors, textures and creativity, making them heartfelt keepsakes that the recipient is likely to cherish.
In this article, I’ll share how I make DIY thank you cards with a personal touch, from gathering materials to trying different techniques that reflect personality and care. Whether you’re crafting cards for teachers, coworkers, family or friends, these tips and methods will help you add that extra layer of warmth and authenticity to each one.
Materials That Set the Tone
Before jumping into the creative side of making DIY thank you cards with a personal touch, I make sure to have the right materials. The beauty of handmade cards is that you can use both craft store items and upcycled materials found at home.
Here’s what I usually gather:
- Blank card stock or pre-folded cards
- Colored or patterned paper
- Double-sided tape or craft glue
- Scissors, craft knives and paper trimmers
- Decorative stamps and ink pads
- Embellishments like ribbons, buttons or washi tape
- Stickers or die cuts
- Lettering pens or calligraphy markers
- Envelopes to match the card size
Having a variety of textures and colors on hand allows me to experiment with different layouts and styles depending on the recipient.
Planning the Card’s Message
Every thank you card I create starts with intention. I think about who I’m making it for and why I want to thank them. Is it a friend who helped me during a tough week, a neighbor who watered my plants or a mentor who offered guidance?
The message should match the sentiment. I prefer writing a personal note inside instead of relying only on printed text. Even if it’s just a few sentences, handwriting makes it feel sincere. When I plan the design, I make sure there’s enough space left inside for this note. A blank interior is usually best for this reason.
Picking a Theme or Design Style
Designing DIY thank you cards with a personal touch becomes much easier once I settle on a theme. It doesn’t have to be complicated, a color palette or mood is enough to guide the process.
Here are some themes I’ve worked with:
- Minimalist and modern – Clean lines, muted colors and subtle texture
- Floral and romantic – Watercolor flowers, soft brush lettering and lace trim
- Rustic and natural – Kraft paper, jute twine and leaf prints
- Bright and cheerful – Bold colors, fun shapes and hand-drawn doodles
- Vintage-inspired – Aged paper, script fonts and sepia tones
The key is to match the style to the recipient’s personality or the nature of your thank you.
Designing the Card Front
When it comes to the front of the card, I always ask myself: what do I want this card to say visually before the recipient even opens it? That’s where embellishments and layout come in.
I might stamp “Thank You” in calligraphy ink at the center and then frame it with floral illustrations or geometric paper cutouts. Other times, I use layering. Placing patterned paper beneath a solid-colored focal point adds depth and interest. Foam dots can give elements a 3D effect and help them stand out.
Textures also make a big difference. I like to mix matte and glossy surfaces or use embossing powder to give lettering a raised, shiny look. These little details turn a simple card into something special.
Using Mixed Media Techniques
One of my favorite parts of making DIY thank you cards with a personal touch is exploring mixed media techniques. I’ll often combine watercolor backgrounds with stamped images or collage elements. Watercolor washes are forgiving and create a dreamy backdrop for inked sentiments.
Ink blending is another go-to method. I use blending brushes or sponges with pigment ink pads to create gradient effects. This works especially well on card edges or behind a central message.
If I want something more tactile, I reach for fabric or lace scraps, buttons, or stitched elements. A piece of ribbon tied into a bow or a stitched border using embroidery thread adds handcrafted elegance without much effort.
Creating Pop-Up or Folded Elements
To really make the card stand out, I sometimes add interactive elements. A simple pop-up inside the card can be a delightful surprise. These are easier than they look. All it takes is a few strategic cuts and folds.
Accordion folds or waterfall card mechanisms make the card even more unique. These are especially fun when I want to include several small messages or design elements inside. Fold-out panels are great for thank you cards given after big events like weddings or graduations.
Adding Personalized Details
The whole idea behind DIY thank you cards with a personal touch is to tailor them to the person receiving them. Including initials, names or references to shared memories makes the card feel one-of-a-kind.
I’ve created cards that featured:
- Hand-drawn caricatures of the recipient
- A miniature version of their favorite flower
- Quotes they love or phrases they say often
- A paper version of a place we visited together
- Their favorite color combination
These personalized elements are what make the card more than just a note, they turn it into a thoughtful gift.
Incorporating Nature and Found Materials
There’s something grounding about using nature in cards. I’ve used pressed flowers, dried leaves, small feathers and even natural twine in my thank you cards. These items give a rustic, organic vibe that many people find comforting and beautiful.
If I’m in a sustainable mood, I reuse materials. Old book pages, fabric scraps, packaging paper or even coffee-stained paper make great additions. Not only does it reduce waste, but it also adds texture and character.
Finishing Touches
After assembling all the layers and decorations, I go over the card to make sure everything is securely attached. I check for glue marks, smudged ink or crooked labels. Then I let everything dry thoroughly before placing it in an envelope.
Sometimes I decorate the envelope too, with washi tape along the edges, a matching sticker seal or a small stamped design in the corner. It’s a great way to extend the handmade charm beyond the card itself.
Writing the Message Inside
Even the most beautifully designed card falls short if it lacks a heartfelt message. That’s why I spend time composing a note that feels personal and genuine. I mention the specific reason for the thank you, how it impacted me and what it meant.
For example, “Thank you so much for your kind words last week. They lifted my spirits more than you know,” feels far warmer than “Thanks for everything.” I also sign the card with a little doodle or heart, which adds one final personal touch.
Creative Ideas for Kids to Join In
Thank you cards aren’t just for adults. I like to include my kids in this activity too. They use crayons, stickers and construction paper to make their own versions. If they’re too young to write, they draw a picture inside. It’s a wonderful way to teach gratitude early.
Sometimes, I guide them with simple designs, like a card that folds open to reveal a handprint, or one that uses cut-out letters they can glue into place. Their creativity often surprises me and makes the thank you even more meaningful for the person receiving it.
Seasonal and Themed Cards
I enjoy tailoring cards to seasons or special themes. For example:
- Spring – Pastels, butterflies, blooming flowers
- Summer – Bright colors, suns, beachy themes
- Autumn – Warm tones, leaves, acorns
- Winter – Snowflakes, cozy textures, rich colors
For holiday thank yous, I include motifs like hearts for Valentine’s Day, pumpkins for Thanksgiving or stars for the new year. These subtle nods to the season help the card feel even more thoughtful.
Thank You Cards as Gift Add-Ons
I often include DIY thank you cards with a personal touch as part of a larger handmade gift. For instance, if I’m giving someone baked goods, I tuck the card into the box. If I’m gifting a handmade candle, I attach the card with twine.
It’s a simple gesture that completes the package. In some cases, the card ends up being the most treasured part of the gift because of the time and thought put into it.
Building a Thank You Card Stash
One habit I’ve started is creating a batch of thank you cards in advance. When I have time, I sit down and make several cards using similar layouts but with slight variations in color or embellishments. Then I store them in a labeled box so I always have a card ready when the occasion arises.
Having this stash has saved me countless times when I needed a last-minute thank you for a neighbor or a teacher. It’s a helpful way to stay thoughtful without scrambling.
Sharing and Inspiring Others
After making dozens of DIY thank you cards with a personal touch, I’ve also begun sharing them with others, through blog posts, social media or in local craft fairs. I find that people are always looking for new ways to express gratitude and are often inspired to try cardmaking themselves after seeing how accessible it is.
I encourage others to embrace imperfection, try new techniques and enjoy the process of creating something from the heart. No two cards ever look exactly the same, and that’s what makes them so special.
Conclusion
Making DIY thank you cards with a personal touch has enriched the way I show appreciation. It’s not just about paper, glue and ink, it’s about telling someone they matter, that their kindness didn’t go unnoticed and that I took the time to say so.
With a few materials, a little creativity and a lot of heart, anyone can craft thank you cards that go beyond the expected. So whether you’re thanking a friend, a mentor or a stranger who did something kind, consider making a card that says it in your own unique way. It might be a small gesture, but it carries a lasting impact.

GIPHY App Key not set. Please check settings