

 Z
Z
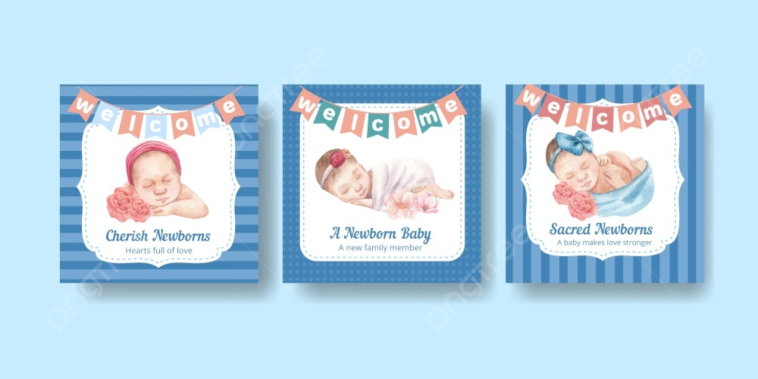
Making greeting cards by hand has always been one of my favorite ways to express creativity and share a meaningful message. I’ve found that one of the most enjoyable and visually impressive methods is creating easy layered cards with scrapbook paper. These cards have depth, charm, and the kind of professional look that surprises people when they realize it’s handmade.
With just a few basic supplies and a bit of imagination, I can take ordinary pieces of scrapbook paper and turn them into beautiful, layered masterpieces. The best part is, each card I make feels completely unique, thanks to the endless combinations of textures, colors, and patterns available in scrapbook paper collections.
In this guide, I’ll walk through everything I’ve learned about making easy layered cards with scrapbook paper. From selecting the right paper combinations to arranging the layers and adding those final touches, I’ll cover it all step by step.
Selecting Scrapbook Paper Combinations
The key to a successful layered card is contrast and harmony. When I begin a new card, I like to lay out a few coordinating scrapbook papers with different designs, perhaps one with floral elements, one with subtle textures like stripes or dots, and one solid color that can act as a background.
I try to choose papers that complement each other in tone but vary enough to create contrast. Mixing matte and glossy finishes or adding a touch of foil can help different layers stand out from one another. Often, I’ll go for a focal pattern to anchor the design, with supporting papers that tie everything together without overwhelming the eye.
Basic Tools and Materials
Before starting any project, I gather the tools and materials I know I’ll need. It saves me time and keeps the creative flow going.
Here’s my standard list for making easy layered cards with scrapbook paper:
- Blank cardstock bases in white or kraft
- Scrapbook paper in a variety of colors and patterns
- Paper trimmer or scissors
- Bone folder for crisp folds
- Adhesives including glue sticks, tape runners, and foam squares
- Stamps and ink pads
- Sentiment stickers or rub-ons
- Embellishments like rhinestones, ribbons, and enamel dots
Having these items on hand means I can experiment freely without interruption.
Preparing the Base Layer
The first layer I always create is the background base that will go on the card front. I cut a piece of patterned or solid paper slightly smaller than the card base, so there’s a border around the edges.
To add interest, I may ink the edges lightly with a blending sponge or distress the edges using scissors. This gives the card a little rustic charm, especially if I’m going for a vintage or shabby chic look.
Once the base layer is ready, I glue it down evenly on the front of the card using a tape runner or glue stick.
Arranging Layers for Dimension
What gives these cards their signature look is the thoughtful arrangement of layers. I usually create two or three layers of paper stacked on top of the base, each getting smaller to form a sort of frame or focal point.
To make the layers pop, I often use foam adhesive squares between them. That subtle lift gives the card visual depth and makes the central design stand out. I’ve found that layering works best when each piece of paper is a slightly different size and shape, rectangles, squares, banners, or even die-cut shapes.
Sometimes, I like to layer a strip of contrasting paper horizontally across the center and then place a decorative shape on top, such as a scalloped circle or tag, where I’ll later stamp my sentiment.
Adding a Sentiment
A greeting card needs a voice, and this is where I include a sentiment that fits the occasion. Whether it’s “Thank You,” “Thinking of You,” “Happy Birthday,” or something seasonal like “Merry and Bright,” I either stamp the phrase onto a small shape or use a sticker label.
To make the sentiment stand out, I often back it with an additional layer of paper and pop it up with foam tape. The layered look continues into the text area this way, keeping the whole card cohesive.
When I want to get a little fancy, I use heat embossing for a raised, glossy finish. It looks especially lovely on darker paper, creating a professional finish without a lot of extra effort.
Highlighting with Embellishments
Once the main components are in place, I take time to dress up the card with small embellishments. These can be subtle or bold depending on the look I’m going for.
Here are some of my favorite embellishments for easy layered cards with scrapbook paper:
- Tiny paper flowers or leaves
- Brads and eyelets
- Sequins, pearls, or rhinestones
- Die-cut elements like butterflies, hearts, or stars
- Ribbon tied in bows or wrapped as a border
- Washi tape to add visual breaks
I’m always careful not to overdo it. A few well-placed details add elegance, while too many can make the card feel cluttered.
Playing with Color and Texture
One of the reasons I love using scrapbook paper is the variety of textures and finishes available. Some have a linen feel, some shimmer in the light, and others look like real wood or fabric. This diversity allows me to create cards that feel tactile and rich even when I’m using only paper.
When layering, I aim to place a smooth paper against a textured one or pair bold colors with muted tones. A strip of corrugated cardstock or embossed foil adds just enough contrast to make the design pop.
Making Cards for Every Occasion
Easy layered cards with scrapbook paper are versatile enough for any occasion. I’ve made them for birthdays, weddings, thank-you notes, baby showers, sympathy, and even just-because days.
For birthdays, I go for cheerful colors, confetti patterns, and balloons or candles. Wedding cards look beautiful with elegant florals, lace prints, and metallic accents. For sympathy cards, I choose muted tones, soft edges, and simple sentiments that express warmth.
Because scrapbook paper comes in so many themes, I never run out of inspiration.
Using Scraps and Leftovers
One of my favorite things about this type of project is how scrap-friendly it is. I save every leftover strip of scrapbook paper, and when I have a free afternoon, I challenge myself to make cards using only scraps from my box.
Layering works wonderfully with small pieces. I might arrange a diagonal collage of strips or create a quilted background effect. Even the tiniest scraps can be used for punching out shapes or layering behind sentiments.
This not only saves money but also helps me reduce waste and keep my craft space tidy.
Creating Card Sets for Gifting
I often bundle several of these cards together and give them as gifts. A handmade card set makes a thoughtful present for a friend, teacher, or neighbor. I tie them together with ribbon and include matching envelopes.
When making sets, I design the cards around a consistent color palette or theme, so they feel like a coordinated collection. It’s a fun way to stretch my creativity and use up materials in a meaningful way.
Organizing Finished Cards
After I’ve finished a few cards, I place them in a storage box with dividers by occasion. That way, whenever I need a quick thank-you or birthday card, I have a beautiful handmade option ready to go.
I also keep a list of people I want to send cards to each month. This helps me plan ahead and design cards intentionally for upcoming holidays or events.
Experimenting with New Techniques
To keep things fresh, I try out new techniques now and then. Recently, I’ve been experimenting with tearing edges for a rustic effect, layering vellum over patterns for a soft finish, and adding machine stitching along the edges.
I’ve even started layering scrapbook paper on shaped cards, circles, scalloped squares, and hexagons. These fun forms give the traditional rectangle a creative twist and look stunning when layered thoughtfully.
Encouraging Kids and Beginners
One of the best parts about making easy layered cards with scrapbook paper is how approachable the process is. I’ve done this with kids, beginners, and even complete non-crafters, and everyone ends up with a card they’re proud of.
I always say, if you can cut and glue paper, you can make a layered card. It doesn’t have to be complicated to look impressive. The paper does most of the work, it just needs a helping hand to turn into something beautiful.
Selling Handmade Cards
If you’re looking for a creative side hustle, layered scrapbook cards can be a great product to sell at craft fairs or online. Each one is unique, and people love buying handmade items that feel special.
I price my cards based on the time and materials used, and I always make sure to photograph them in good lighting to showcase the textures and layers. Etsy, Instagram, and local pop-up markets are great places to offer them for sale.
Conclusion
Making easy layered cards with scrapbook paper is one of the most rewarding and versatile crafts I’ve discovered. Each card is a small canvas, ready to be filled with patterns, textures, colors, and love. The possibilities are endless, and the process is as relaxing as it is creative.
Whether you’re making cards to give, to sell, or to stockpile for every occasion, the joy of watching simple pieces of paper come together into a meaningful message never fades. With just a little effort and some imagination, you can create heartfelt cards that make others feel remembered and celebrated.
The next time you open your craft drawer, try pulling out your favorite scrapbook papers and layering them together. You’ll be amazed at how easy it is to create something beautiful with what you already have.

GIPHY App Key not set. Please check settings