

 Z
Z
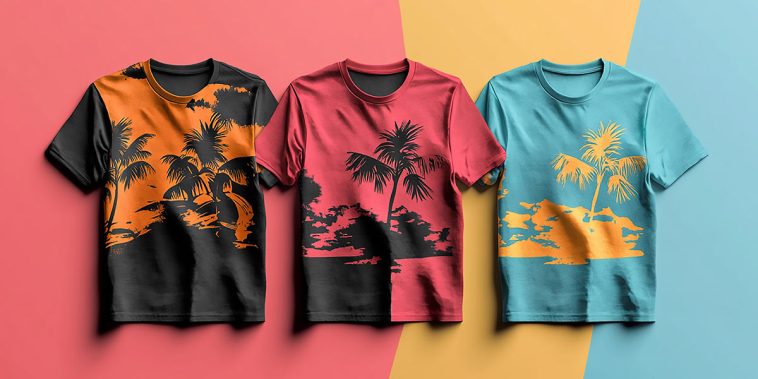
Customized t-shirts are one of the most rewarding DIY projects I’ve worked on. Whether it’s for a birthday gift, a themed event, or just a fun personal fashion statement, making customized t-shirts with iron-on designs is a creative and approachable way to make wearable art. With the right materials and a little patience, anyone can transform a plain shirt into something meaningful, stylish, or hilarious, depending on the message you want to share.
Over the years, I’ve tried a lot of DIY crafts, but this one stands out for being both functional and expressive. The best part is that it doesn’t require professional equipment or a studio to pull off. Once I learned the process and a few techniques to get things right, I started creating shirts for all sorts of occasions: matching family reunion outfits, personalized gifts for friends, and even promotional shirts for small events.
In this guide, I’ll take you through the complete process of making customized t-shirts with iron-on designs. I’ll cover what supplies you need, the different types of transfers available, how to apply them correctly, and the ways you can personalize your creations to make them truly special.
Supplies You Will Need
Before starting the project, I make sure to gather everything I need. Here’s what I typically use:
- Plain cotton or cotton-blend t-shirt
- Iron-on transfer paper or pre-made iron-on designs
- Inkjet printer if I’m printing custom graphics
- Household iron or heat press
- Parchment paper or protective sheet
- Hard flat surface (like a table or countertop)
- Scissors or a cutting machine like Cricut or Silhouette (optional)
The materials you choose can slightly vary depending on whether you’re using store-bought designs, pre-cut vinyl transfers, or printing your own. The good news is that each version works well once you understand the technique.
Types of Iron-On Transfers
There are a few ways to create customized t-shirts with iron-on designs, and each one comes with its own advantages.
Printable transfer paper
This method gives you complete control over the graphic. I often use inkjet-compatible transfer paper, which allows me to design or download an image, print it at home, and then iron it directly onto the shirt. It works best on 100% cotton and light-colored fabrics, although there are special papers for dark shirts too.
Pre-cut vinyl designs
Heat transfer vinyl, often abbreviated as HTV, is one of the most durable options. I use a cutting machine to cut shapes, letters, or logos out of vinyl sheets. Then I weed out the excess, place the design on the shirt, and use a heat source to apply it. This technique is great for sharp text or simple shapes.
Pre-made patches and iron-on motifs
These are ready-to-use iron-on patches or motifs you can find in most craft stores. They’re great for quick customization, especially if I don’t want to design anything from scratch.
Designing Your T-Shirt
I always like to start with a clear idea of what I want the finished t-shirt to look like. Whether it’s a funny quote, a name, a favorite cartoon character, or a motivational message, having a visual concept helps guide the design process. Here’s how I approach it:
- Text only: For names, quotes, or slogans, I use bold fonts with clean lines. Thin fonts can be tricky to transfer, especially with vinyl.
- Graphics and images: If I’m printing a picture, I make sure it’s high resolution and I use mirror image settings if needed, especially for transfer paper.
- Multi-layered designs: For more intricate work, like multi-color vinyl designs, I cut and apply one layer at a time to avoid overlapping issues.
Personalizing customized t-shirts with iron-on designs allows me to match the shirt to the personality of the person who will wear it. It also lets me include inside jokes or messages that only certain people will understand.
Prepping the Shirt
Before applying any transfer, I always wash and dry the shirt without using fabric softener. This removes any chemical residue and helps the design adhere better.
I also iron the shirt lightly before applying the design to eliminate any wrinkles. A flat surface is essential for getting the design to stick properly, so I place a cutting board or heavy cardboard inside the shirt to keep it firm and flat.
Applying the Iron-On Design
Here comes the part where everything comes together. Depending on what kind of transfer I’m using, I follow these steps:
For printable transfers
- Print the image onto the transfer paper according to the instructions. For most light-fabric papers, I print a mirror image.
- Trim the design close to the edge.
- Place it face-down on the shirt.
- Cover with parchment paper and apply heat using an iron, pressing down firmly for 20–30 seconds per section.
- Let it cool slightly, then peel off the backing carefully.
For vinyl designs
- Position the vinyl with the clear backing on top.
- Use a hot iron or heat press to apply pressure and heat evenly.
- Let it cool slightly and peel off the plastic film slowly.
For pre-made patches
- Place the patch where you want it.
- Cover with a pressing cloth.
- Apply heat for 30–40 seconds.
- Check the edges and repeat if necessary.
I always take my time to press evenly and avoid moving the iron around too much, which can cause the design to shift or wrinkle.
Troubleshooting Common Problems
Even after doing this for years, I still occasionally run into small issues. Here’s how I usually solve them:
- Design peels up: Not enough heat or pressure. I reapply parchment paper and go over it again firmly.
- Cracks after washing: Usually from not pre-washing the shirt or using poor-quality paper. I make sure to wash shirts first and use high-grade materials.
- Faded prints: I wash the shirt inside out and on cold to preserve the design. Air drying also helps.
These small adjustments go a long way in improving the final result of customized t-shirts with iron-on designs.
Decorating for Specific Occasions
One of my favorite parts of this DIY project is how easily it adapts to different themes and events. I’ve made themed shirts for:
- Bachelorette parties with custom slogans and matching colors
- Birthday shirts with ages and funny nicknames
- Holiday gear like Halloween costumes or Christmas pajamas
- Baby announcements that say “Promoted to Big Sister”
- Graduation shirts with school names and class years
No matter the occasion, it’s easy to whip up a shirt that feels tailor-made for the moment.
Gift Packaging Ideas
When I give customized t-shirts with iron-on designs as gifts, I like to package them creatively. A few of my favorite ideas include:
- Rolling the shirt and tying it with a ribbon and custom tag
- Folding it into a fabric pouch with a note inside
- Placing it in a simple gift box with confetti and a themed sticker
Presentation makes a big difference and adds that final personal touch.
Washing and Care Instructions
After gifting a customized t-shirt, I always include washing instructions to help preserve the design:
- Turn the shirt inside out before washing
- Use cold water and mild detergent
- Avoid bleach and fabric softener
- Air dry or tumble dry low
- Avoid ironing directly on the design
These tips help extend the life of the shirt and keep the design looking great.
Ideas for Group Projects
Customized t-shirts with iron-on designs are perfect for group settings too. I’ve led workshops where friends and family made shirts together, and it’s always a hit. Here are some ways to get others involved:
- Craft parties: Set up a table with blank shirts and a few pre-cut designs
- Kids’ birthday stations: Let children decorate their own shirts with pre-printed transfers
- Team building: Encourage coworkers to design fun shirts for events
- School projects: Create class-themed shirts for field trips or spirit week
These collaborative efforts create shared memories and give everyone a one-of-a-kind souvenir.
Creative Design Inspiration
If I ever hit a creative block, I look for inspiration in everyday life. Some great sources include:
- Pinterest boards full of clever quotes and color palettes
- Lyrics from a favorite song
- TV shows or books that the recipient loves
- Vintage logos or retro styles
- Minimalist shapes for a more modern look
Even simple monograms or single words can make a bold statement when applied with thought and style.
Final Thoughts
Customized t-shirts with iron-on designs combine creativity, practicality, and personal expression in one easy-to-make project. They’re affordable, fun to create, and offer endless possibilities for customization. Whether you’re making one for yourself or creating a whole batch as gifts, the process is satisfying from start to finish.
Every shirt I make carries a bit of my personality and care, which makes it more than just a garment, it becomes a memory. If you’ve never tried this before, I highly recommend giving it a go. You’ll be amazed at what you can create with just a blank shirt, a little heat, and a great idea.
Let your imagination guide you, and soon you’ll have a wardrobe, or a gift basket, full of meaningful, wearable art. Customized t-shirts with iron-on designs are not just a craft, they’re a statement, and they’re made better when you make them yourself.



GIPHY App Key not set. Please check settings