

 Z
Z
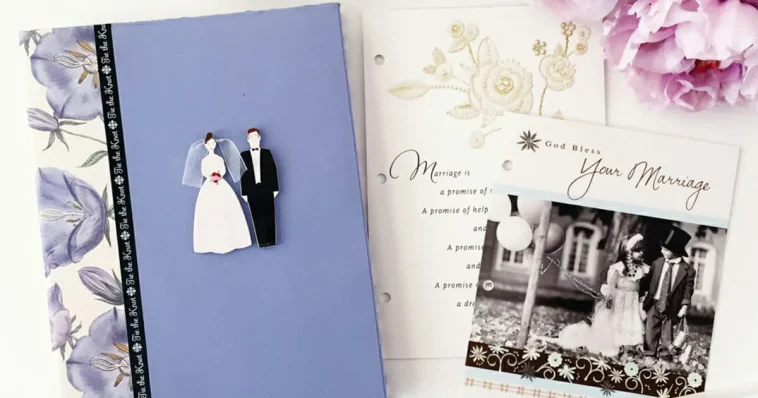
Cardmaking has always been a favorite way for me to express creativity, and one of the most powerful techniques I’ve come to love is texture. Learning how to add texture to your card designs transforms flat, ordinary paper into something tactile, engaging and visually rich. Texture doesn’t just enhance the appearance of a card, it also makes it feel more luxurious and thoughtful in the hands of the recipient.
What I find most exciting about texture is how it opens up endless creative possibilities. Whether it’s through embossing, layering, or adding dimensional elements, each card becomes a unique work of art. If you’re wondering how to elevate your cards from basic to breathtaking, mastering how to add texture to your card designs is the perfect place to start.
The Importance of Texture in Handmade Cards
Texture creates a sense of depth, interest and sophistication. When someone receives a card with raised elements, smooth satin finishes or rough edges, they experience it on a sensory level. That tactile quality adds another layer of connection between the sender and the recipient.
Textured cards look polished and often resemble high-end stationery or boutique designs. Even the simplest cards come alive when you introduce texture in clever ways. Whether you’re making cards for birthdays, weddings, holidays or everyday gratitude, texture is one of the easiest ways to elevate your design.
Using Embossing for Raised Effects
One of the classic methods I always return to is embossing. Whether you choose dry embossing with folders or heat embossing with powders and a heat gun, both techniques offer beautiful results.
Dry embossing involves placing cardstock in a textured folder and running it through a manual die-cutting machine. This creates a raised pattern or image on the paper surface. I often use floral patterns, swirls or geometric lines depending on the occasion.
Heat embossing requires a stamp, embossing ink, and embossing powder. After stamping your image, sprinkle the powder over the wet ink, tap off the excess and then heat it until it melts into a raised, shiny finish. The result is a luxurious touch, especially when using gold, silver or pearlized powders.
Layering Paper and Materials
Another go-to technique in how to add texture to your card designs is layering. I start with a base cardstock, then add multiple layers of different materials to create dimension.
Here are a few materials I frequently use for layering:
- Patterned paper
- Vellum
- Handmade or recycled paper
- Kraft paper
- Foil or glitter paper
I vary the shapes and sizes of the layers and mount them with foam adhesive squares for a subtle lift. This simple approach gives depth without overwhelming the design. You can keep it symmetrical or play with asymmetry for a modern twist.
Adding Fabric Elements
Incorporating fabric is one of my favorite ways to add softness and movement to cards. Think of lace, burlap, twill, organza or even felt.
For romantic or vintage cards, I love gluing a small strip of lace across the card front. On more rustic designs, a twine or burlap bow gives a handmade charm. I sometimes use fabric scraps in the background or even sew them onto the card for a stitched look.
Fabric adds a tangible richness that feels comforting and special. It works especially well for wedding cards, baby announcements or holiday greetings.
Using Dimensional Embellishments
Another simple way I’ve found to master how to add texture to your card designs is through dimensional embellishments. These little elements catch the light and provide a tactile contrast against the flat paper.
Some of my favorite embellishments include:
- Buttons
- Paper flowers
- Wooden shapes
- Adhesive pearls or rhinestones
- Die cuts mounted with foam tape
One trick I love is clustering embellishments in one corner and balancing them with a simple sentiment. It gives the design weight and focus without being too busy. You can also create layered flower arrangements or use brads and eyelets for metallic accents.
Playing with Distress Techniques
Distressing is an artistic way to bring in texture and visual interest. I use distress inks around the edges of my cardstock to create a weathered or vintage look. Sometimes I tear paper edges or crumple a piece slightly before adhering it to the card.
These rough textures contrast beautifully with smooth embellishments or glossy finishes. Distressed textures work great for masculine cards, travel themes or heritage-inspired projects.
Another trick I love is dry brushing white or gold paint over embossed textures. It highlights the raised parts and adds a soft metallic shine.
Using Stencils and Texture Paste
Stencils paired with texture paste allow you to create raised images or patterns across your card. I use a palette knife to spread the paste over the stencil, then lift it to reveal the design.
Texture paste can be colored with ink, paint or mica powder for a custom look. You can also sprinkle glitter over wet paste or add embossing powder and heat it up for extra drama.
The final effect is bold and artistic. I often use this method for modern or abstract designs and love how versatile it is.
Exploring Nature-Inspired Textures
Sometimes, the most striking textures come from the natural world. I enjoy adding pressed leaves, small twigs or dried flowers to my card designs. These organic materials provide a unique tactile quality and are ideal for nature-themed cards.
I often collect leaves or ferns, press them between heavy books for a few days, and then attach them using strong adhesive. The end result is delicate, earthy and beautifully one-of-a-kind.
This approach works well for seasonal cards, such as autumn greetings or spring wedding invitations.
Incorporating Stitching and Thread
Hand stitching adds a personal touch to cards, and it’s easier than it looks. I poke small holes with a paper piercer and use embroidery thread to stitch borders, outlines or even entire shapes.
Simple stitches like backstitch or cross stitch give the card an old-fashioned, handmade charm. For machine sewers, you can run your cardstock through the sewing machine using a zigzag or straight stitch around the border or on layered paper elements.
Stitching not only adds texture but also a touch of craftsmanship that recipients will appreciate.
Adding Texture with Die Cuts and Punches
Die cuts are another fantastic way to bring in layered texture. I like using intricate floral dies, word sentiments or border designs and cutting them from thick cardstock or specialty paper like glitter or foil.
By layering die cuts or mounting them with foam squares, you can create texture and shadows. Edge punches can also create lace-like borders that add delicate detail to cards.
Punches shaped like butterflies, stars or hearts let you build layers that can be folded slightly upward to enhance dimension even more.
Mixing Matte and Glossy Finishes
Texture doesn’t have to be all about raised surfaces. Contrasting finishes also give a card tactile interest. I like mixing matte backgrounds with glossy or metallic accents.
For example, pairing kraft cardstock with a shiny foil sentiment or a matte white card with glossy ink creates a sleek, modern contrast. I also use clear gloss medium to highlight certain parts of a stamped image, giving them a raised, shiny texture without any bulk.
Even slight shifts in surface finish can dramatically improve the visual depth of your card.
Designing Backgrounds with Texture
Creating a textured background sets the stage for the rest of the design. I use techniques like:
- Splattering paint
- Adding ink with a sponge dauber
- Crumpling and flattening tissue paper
- Using gesso or gel medium with a brayer
These methods add a sense of movement and richness. You can keep the background monochromatic for a subtle look or add bold color for dramatic impact. The more variation in the background, the less you need to embellish the foreground.
Creating Focal Points with Mixed Media
Mixed media elements are perfect for bringing texture to the center of attention. Combining paper, paint, fabric and found objects makes your card more like a small art canvas.
I like layering corrugated cardboard, lace, old book pages and stamped images into one central cluster. These mixed textures draw the eye and turn a card into a conversation piece.
If you enjoy experimenting, this is a rewarding and creative way to push your skills further.
Storing and Mailing Textured Cards
Once you know how to add texture to your card designs, it’s important to consider how you store or mail them. Highly textured cards can be delicate or bulky.
I use padded envelopes or clear plastic card boxes when gifting or mailing thick cards. For extreme dimension, I’ll add a note on the envelope to hand-deliver or mark as fragile.
When storing, I separate cards with sheets of wax paper or parchment to prevent embellishments from sticking or flattening.
Final Thoughts
Learning how to add texture to your card designs opens the door to infinite creative possibilities. Whether you enjoy subtle embossing, bold layers or tactile embellishments, texture transforms a flat card into something truly engaging and memorable.
I’ve found that textured cards don’t just look better, they feel better, both in your hands and in the heart of the person receiving them. Each layer, each material and each detail becomes a part of the story you’re telling. So whether you’re adding a few raised elements or building an elaborate mixed media piece, texture will always be your best friend in cardmaking.
Next time you sit down to create, ask yourself how the card can be seen and felt. Then go ahead and let your fingers guide your creativity, one textured element at a time.

GIPHY App Key not set. Please check settings