

 Z
Z
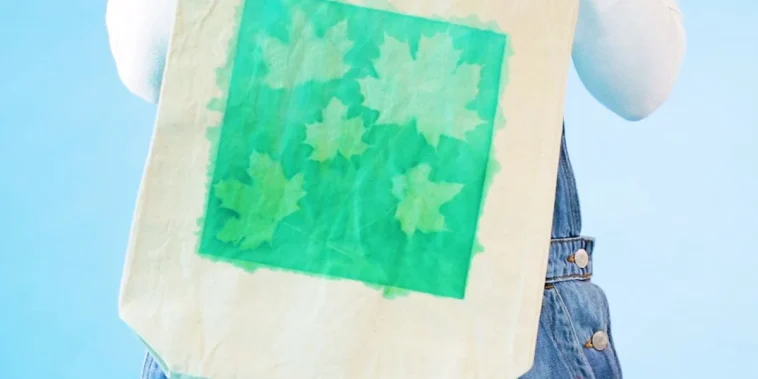
I enjoy making practical things beautiful, and tote bags have always been one of my favorite blank canvases. They’re useful, affordable, and incredibly easy to personalize. Whether I’m making gifts, designing event favors, or just updating my own accessories, learning how to create custom tote bags with fabric paint has become one of my go-to DIY projects.
With just a few simple tools and a little creativity, a plain canvas tote can be transformed into something that reflects personality, humor, inspiration, or seasonal flair. The process is relaxing and rewarding, and the end result always feels like something special. If you’re looking to craft thoughtful gifts, create custom merchandise, or simply enjoy a fun afternoon of painting, this guide will walk you through how to create custom tote bags with fabric paint from start to finish.
Materials You Will Need
Before starting the project, I gather everything I need so I can work without interruption. Most of the supplies are easy to find at craft stores or online, and many can be reused for future projects.
Here’s what I like to have on hand:
- Plain canvas tote bags
- Fabric paint in a variety of colors
- Paintbrushes in different sizes
- Foam brushes or sponges
- Fabric markers or fine-tip pens for detail work
- Stencils, painter’s tape, or adhesive vinyl
- Cardboard or a flat insert to place inside the bag
- Iron and ironing board for setting the paint
- A drop cloth or newspaper to protect the work surface
I like to pre-wash the tote bags if they are brand new. This removes any sizing or treatment and ensures the paint adheres better. I don’t use fabric softener, just a simple detergent and air-dry method.
Setting Up the Work Area
A clean and organized workspace makes a big difference in how enjoyable the project is. I cover the table with newspaper or a plastic cloth, tape down my stencils or reference images, and make sure my brushes and paints are ready. I also keep a cup of water and a cloth nearby for cleaning brushes between colors.
Inside each tote bag, I place a piece of cardboard or thick paperboard. This prevents paint from bleeding through to the other side and gives a firmer surface to paint on. Once the bag is stretched flat and smooth, I’m ready to start designing.
Deciding on the Design
One of the best parts about creating custom tote bags is the freedom to design anything I like. Sometimes I sketch ideas on paper first, but other times I let the paint lead the way. A few design ideas I’ve used include:
- Inspirational quotes or phrases
- Botanical and floral patterns
- Abstract color splashes and brush strokes
- Animal silhouettes or pet portraits
- Seasonal themes like pumpkins, snowflakes, or beach vibes
- Personalized monograms or names
- Geometric shapes and patterns
For text-based designs, I prefer stencils or pre-printed templates. For more freehand artwork, I’ll sketch lightly with a fabric pencil or chalk to guide my brushstrokes. The tote’s natural texture adds charm, even when the lines aren’t perfect.
Painting With Stencils and Tape
Stencils make it easy to create crisp, professional-looking designs. I secure them to the bag with painter’s tape to prevent shifting. Using a foam brush, I dab paint gently into the stencil without oversaturating. Too much paint can seep under the edges, so less is often more.
For patterns with multiple layers or colors, I wait for one section to dry before moving on. I also like using tape to mask off stripes, borders, or geometric blocks of color. It adds structure to the design and makes the end result feel more polished.
Freehand Painting Techniques
When I’m feeling bold, I skip the stencils and paint freehand. I use small brushes for details and larger ones for broader strokes. Layering is key here , starting with a light background and gradually adding depth or color accents. Flowers, abstract shapes, and watercolor-style blends work beautifully for this method.
To give a hand-drawn look, I outline designs with a fabric marker or thin brush once the paint is dry. This adds definition and a whimsical, artistic feel. Mixing metallic paints or glitter-infused colors can also add a playful or elegant twist to the finished tote.
Personalizing With Names and Monograms
Customized bags always feel special, and names or initials make great focal points. I’ve made totes with single-letter monograms framed by leaves or flowers, full names in bold lettering, and even fun nicknames or titles.
To make the letters pop, I use high-contrast paint colors or create a shadow effect by painting a second layer slightly offset from the first. I’ve also used gold or silver paint for a touch of glamour. Personalizing totes makes them ideal for birthday gifts, bridal party favors, or welcome bags.
Letting the Paint Dry and Setting the Design
Once the design is complete, I let the tote dry completely , usually overnight. I avoid moving or folding it during this time to prevent smudging. After drying, the next step is setting the paint so it becomes permanent and washable.
I use an iron on medium heat, pressing the design with a thin cloth or parchment paper in between. Holding the iron in place for about 20 seconds on each section is usually enough. This helps the paint bond with the fabric and ensures the design won’t peel or fade when washed.
Caring for Painted Tote Bags
To keep the bags looking fresh, I recommend spot-cleaning when possible or hand-washing in cold water. Machine washing on a gentle cycle inside out also works if the paint has been properly set. I let them air dry instead of using the dryer to extend the life of the artwork.
If I’m giving the bag as a gift, I include a small care tag with washing instructions. This helps the recipient enjoy the tote for a long time and appreciate the care that went into making it.
Creative Themes for Custom Totes
The versatility of tote bags means they work for almost any theme or occasion. Some ideas I’ve enjoyed making include:
Eco-friendly market totes
Decorated with produce illustrations, herbs, or the phrase “Shop local” or “Eat fresh”
Teacher appreciation gifts
Painted with apples, books, or quotes like “Teaching is a work of heart”
Holiday-themed totes
Snowflakes, pumpkins, or hearts depending on the season
Pet lovers’ totes
Paw prints, animal faces, or names of pets
Beach and travel bags
Shells, palm trees, or travel-themed maps and quotes
Each design reflects the recipient’s interests or the event’s tone, which makes these bags extra thoughtful. The best part is that no two are ever exactly alike.
Hosting a Paint-Your-Own Tote Party
Painting tote bags makes for a great group activity. I’ve hosted small gatherings where everyone creates their own custom bag. It works well for birthdays, bridal showers, and even kids’ craft days. Each guest picks their own design or uses shared stencils and paint colors.
To make things run smoothly, I set up stations with paintbrushes, stencils, and paint palettes. Everyone gets a blank tote and a cardboard insert, and I demonstrate a few basic techniques before letting everyone create. It’s fun to see how each person’s personality comes through in their artwork.
Using Totes as Gift Packaging
I love using handmade tote bags as gift wrap. Instead of traditional paper, I place other gifts inside the painted bag and tie it with ribbon or twine. It turns the bag into a gift in itself and reduces waste at the same time.
These make especially great bundles when paired with handmade soaps, candles, or snacks. Whether the bag says “Thank You,” “Happy Birthday,” or just features a fun pattern, it adds a memorable touch to any gift.
Mistakes to Avoid and Tips for Success
Every project has its learning curve. Here are a few things I’ve learned while experimenting with how to create custom tote bags with fabric paint:
- Use a firm insert inside the bag to avoid paint bleeding through
- Don’t overload the brush , multiple light layers work better than one heavy coat
- Allow each section to dry before layering colors or moving stencils
- Wash and iron the tote bag before painting to help paint adhere
- If painting words, double-check spelling and spacing beforehand
- Seal the paint by heat-setting after it’s dry
Taking my time and embracing imperfections helps me enjoy the process. Sometimes a smudge or uneven line adds character and reminds me it’s handmade with love.
Why Handmade Tote Bags Make Perfect Gifts
Creating tote bags from scratch allows me to give gifts that are both useful and heartfelt. People always appreciate the thought behind a custom piece, especially when it reflects their interests or style. Whether it’s a punny quote, a bold floral print, or their pet’s name painted by hand, these bags make people smile.
They’re also practical. Everyone needs an extra bag for groceries, books, or errands, and having one that’s personalized makes it more enjoyable to use. I’ve made totes for holidays, thank-yous, baby showers, and even just as a surprise for friends who needed a pick-me-up.
Final Thoughts
Learning how to create custom tote bags with fabric paint has been one of the most rewarding and accessible DIY projects I’ve taken on. The materials are simple, the process is calming, and the possibilities are endless. Whether I’m working on a quiet solo project or hosting a painting night with friends, these totes never fail to inspire creativity.
The best part is seeing someone carry a tote I made just for them , knowing it’s not just another bag but a one-of-a-kind piece with meaning behind every brushstroke. With a few supplies and a little imagination, you too can bring your designs to life and make beautiful, useful gifts that will be treasured again and again.



GIPHY App Key not set. Please check settings