

 Z
Z
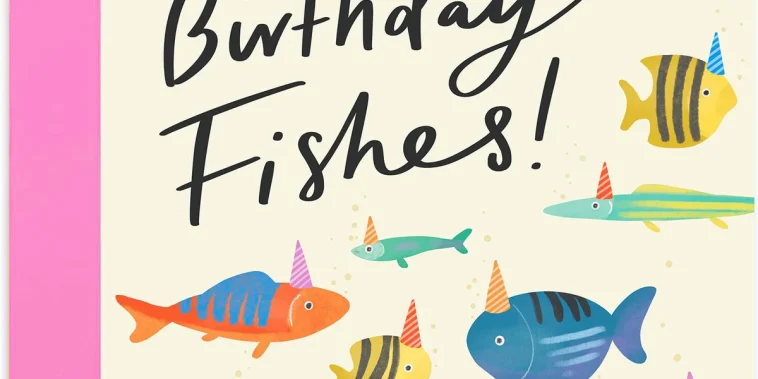
Quilling is one of those artistic techniques that adds charm and elegance to even the simplest paper crafts. It’s a surprisingly relaxing process too, and I’ve found that making a birthday card using this method turns an ordinary gesture into something unforgettable. Learning how to make a birthday card with quilling has opened the door to so much creativity in my gift-giving.
Quilling involves rolling thin strips of paper into shapes that you then arrange into decorative designs. What seems intricate at first quickly becomes second nature, and the result always makes the recipient feel extra special. In this article, I’ll walk you through the tools, ideas, and techniques I use to make unique birthday cards with quilling from start to finish.
Why Quilling Makes Cards Extra Special
Every time I hand someone a card I made with quilling, their eyes light up. There’s something about the three-dimensional paper art that captures attention. It doesn’t feel mass-produced. It feels intentional and personal.
Learning how to make a birthday card with quilling taught me that you don’t need expensive materials to impress people. What really matters is the detail, effort and thought you put into each roll and coil.
Tools and Materials You’ll Need
Before I begin designing, I lay out all the tools and materials I need. This helps keep the process smooth and enjoyable. Here’s what I use when creating a quilled birthday card:
- Quilling paper strips in various colors, usually 3mm or 5mm width
- A slotted quilling tool
- Tweezers
- Glue with a fine-tip applicator
- Toothpicks or needles for detail work
- Blank cardstock for the card base
- Scissors or a craft knife
- Ruler and pencil for planning
- Optional extras: quilling comb, crimper tool, or border buddy
You can find quilling kits online or at most craft stores. I often mix and match strips from different packs depending on the color scheme I want for the birthday card.
Planning the Card Layout
Once I have my tools ready, I sketch out a simple layout. This doesn’t need to be a full drawing, just a light pencil outline on the card front showing where I want the quilled elements to go. I usually decide if I want a central design like a cake or balloon, or a floral border around the edges.
Since I’m focusing on how to make a birthday card with quilling, I try to keep my layout balanced between empty space and detailed designs. Too many quilled elements can overwhelm the card, while too few might feel unfinished.
Preparing the Card Base
I like to start with a standard 5-by-7-inch blank card made from thick cardstock. If I’m cutting it myself, I score the fold down the middle using a ruler and bone folder for a crisp crease. Then I choose a background color, sometimes I use pastel tones for softness or jewel tones for something more dramatic.
I also make sure the card can stand up on its own once finished. This means making sure it’s folded evenly and that the glue doesn’t warp the paper. Weight matters when working with multiple quilled pieces.
Basic Quilling Techniques to Know
If you’re learning how to make a birthday card with quilling for the first time, mastering the basic shapes is key. Here are the ones I use most:
- Tight coil – a tightly rolled circle glued in place
- Loose coil – a looser version that expands before being shaped
- Teardrop – a loose coil pinched on one end
- Marquise – a loose coil pinched on both ends
- Scrolls – unglued coils that unfurl for a delicate effect
- Heart – two coils pinched into heart shapes and glued together
I make a few of each shape first to get a feel for the paper. Then I use these elements to form larger patterns like flowers, balloons, or swirls.
Creating a Focal Point
I often start with one large focal design in the center of the card. For birthday cards, some ideas I like include:
- A layered birthday cake made from stacked teardrop and marquise shapes
- A cluster of balloons using circles and swirls with string-shaped paper
- A big blooming flower in the middle, maybe with a message banner below
- A quilled number indicating the birthday age, surrounded by spirals
This design sets the tone. Once the main shape is assembled and glued down, I begin building the rest of the card around it.
Adding Decorative Accents
With the centerpiece complete, I turn to the supporting decorations. Small flower buds, leaves, and scrolls always bring the card to life. If I’ve made a cake, I’ll add candles made of tight coils with orange flame shapes. For balloon designs, I use curving strips to mimic strings and motion.
Borders made of tiny quilled shapes look delicate and detailed. I’ve also used scrolls to create garlands that wrap around the corners. These little additions make all the difference in how professional and refined the finished card looks.
Gluing Techniques for Clean Results
Glue application can make or break a quilling project. I always use a precision-tip bottle or apply glue with a toothpick. Only a tiny dab is needed for each shape. Too much glue seeps out and ruins the design, while too little won’t hold the coils in place.
I also glue each piece down as I go, pressing gently with tweezers. It helps to work on one small section at a time and let it dry before moving to the next. Patience here really pays off.
Incorporating a Personal Message
Once the design is set and dry, I focus on the message. Sometimes I write directly on the card using a brush pen or fine-tip marker. Other times I write on a small banner made of paper and glue it in place.
I keep my messages short and sweet unless I’m writing something personal inside the card. Even then, I use space wisely. I make sure there’s room inside the card for my handwritten words, and I avoid letting the decorations crowd the area where I plan to write.
Envelope Decoration for a Complete Look
After all the work I put into the card itself, I don’t neglect the envelope. A simple stamped design, a quilled flower at the corner, or colorful washi tape along the edge helps tie it all together.
Sometimes I make a custom envelope out of matching scrapbook paper. It’s an extra touch that turns the card into a full gift experience.
Seasonal and Thematic Variations
Another reason I love learning how to make a birthday card with quilling is how adaptable the technique is. If I’m crafting for a spring birthday, I use fresh colors and floral shapes. For a summer birthday, I bring in beachy tones, sunburst designs and fun citrus slices made from coils.
For kids, I’ve created quilled animals, cupcakes or their initials. For milestone birthdays, I add a bit of sparkle with metallic paper or glitter glue around the edges.
Common Mistakes and How to Avoid Them
Over time, I’ve run into a few bumps while learning how to make a birthday card with quilling. Here are some issues and how I’ve solved them:
- Warping cardstock – Use less glue and heavier paper for the base
- Shapes coming undone – Let each coil relax slightly before shaping and glue quickly
- Smudges from hands – Wash hands regularly and avoid touching the paper too much
- Lack of contrast – Choose colors that stand out from the card background
Every mistake is part of the learning curve, and often, it leads to a new technique I hadn’t considered before.
Storage and Shipping Tips
Quilled cards can be delicate. When I plan to mail one, I place it in a padded envelope or tuck it inside a small cardboard sleeve for protection. Some of my designs are raised, so they need a little extra room.
If I’m making a batch to keep for future use, I store them in a plastic container with wax paper between each card to prevent them from getting flattened.
Giving Your Card as Part of a Gift
A quilled birthday card makes a beautiful standalone gift, but I sometimes pair it with something else, a matching handmade bookmark, a small framed quilled art piece, or even baked goods. The card serves as both message and decoration, and it often becomes the item people keep long after the celebration ends.
Encouraging Others to Try Quilling
Many friends and family who’ve received one of my cards have asked how to make a birthday card with quilling themselves. I always tell them to start simple. A flower made from six teardrop shapes and a tight coil center is a great beginner project. Once you’ve made a few designs, your confidence grows, and soon you’ll be designing full cards with ease.
Why Handmade Cards Matter
In a world full of instant messages and generic cards from store shelves, a handmade card stands out. It says, “I took time for you.” That’s why I keep coming back to quilling, not just as a craft, but as a way to show appreciation and celebrate the people in my life.
Conclusion
Learning how to make a birthday card with quilling has added a whole new dimension to my creative life. The process is calming, the results are stunning, and the joy it brings to others is unmatched. With a few simple tools, a little bit of time, and a whole lot of love, you can turn paper strips into meaningful works of art.
If you’ve never tried quilling before, now’s the perfect time to start. Grab some paper strips, roll your first coil and let your imagination lead the way. Your next birthday card might just become the most memorable gift someone receives.

GIPHY App Key not set. Please check settings